Let’s look at the ControlNet Depth preprocessor + model and test it to its limit. This article is meant to be a ControlNet Depth tutorial and guide based on my personal tests and workflows.
To follow along, you will need to have the following:
- Stable Diffusion Automatic 1111 installed.
- ControlNet extension installed. (check out ControlNet installation and guide to all settings.)
I’ve written tutorials for both, so follow along in the linked articles above if you don’t have them installed already.
You can also watch a YouTube video I made about ControlNet Depth:
What is ControlNet Depth?
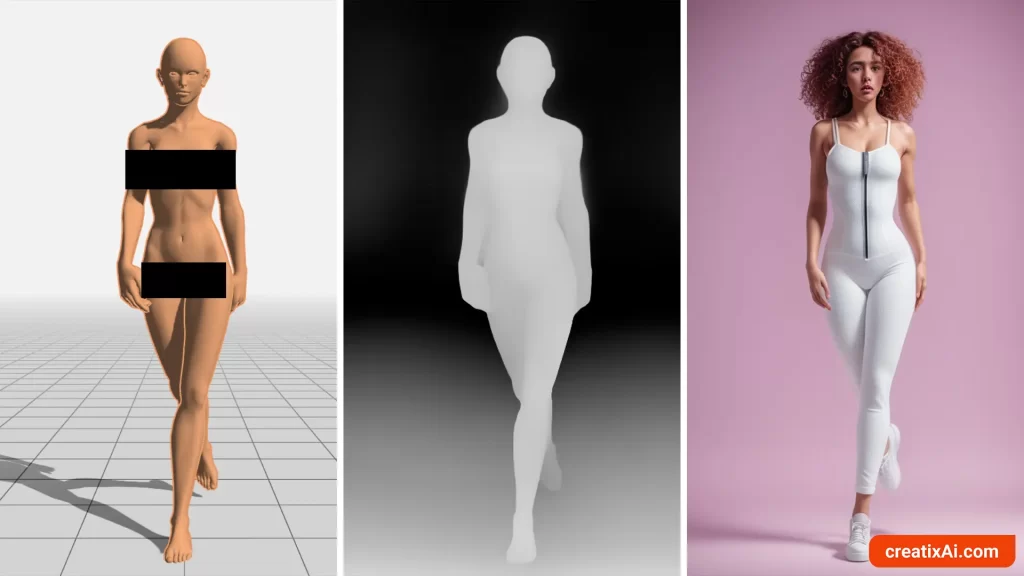
ControlNet Depth is a preprocessor that estimates a basic depth map from the reference image.
A depth map is a 2D grayscale representation of a 3D scene where each of the pixel’s values corresponds to the distance or depth of objects in the scene from the observer’s viewpoint.
With a depth map, you can recreate compositions, poses, and reimagine constant shapes into new ideas.
Simple ControlNet Depth Workflow
If you are wondering how to use ControlNet Depth, let me show you a very simple workflow.
This is just the basics, and more interesting uses are coming up later in the article.
- Pick your model – I used RevAnimated.
- Write a prompt – here’s mine:
- english lady, blonde hair, jewelry, period pieces, 1600s, painterly brushstrokes background, painting, illustration, masterpiece, highres
- negative: deformed, lowres, blurry
- Chose your settings
- Euler a – 25 steps – 640×832 – CFG 7 – Seed: random
Now, open up the ControlNet tab.
- Drop your reference image.
- Select “Enable” and choose “Depth”.
- If you want to see Depth in action, checkmark “Allow Preview” and Run Preprocessor (exploding icon).
- Leave the other settings as they are for now.

Notice how similar the images are, especially when it comes to face and composition.
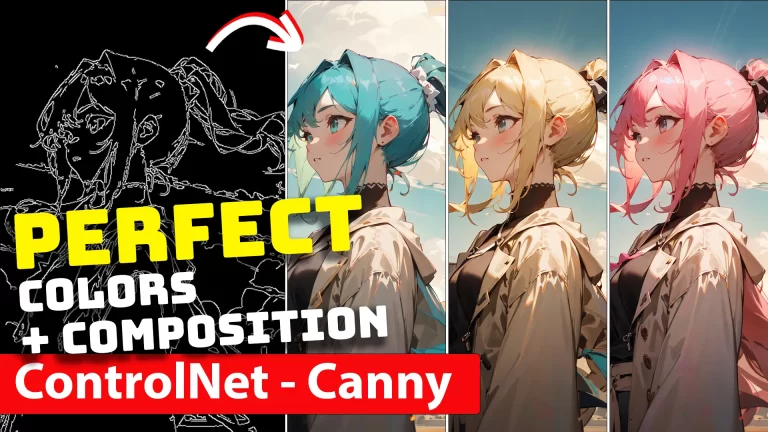
If you’ve read my ControlNet Canny article, you would’ve noticed that the results there are quite different in every image. That’s not the case here.
This makes the Depth Preprocessor incredibly effective in retaining spatial information from the reference image while reimagining certain parts in the new ai-generation.
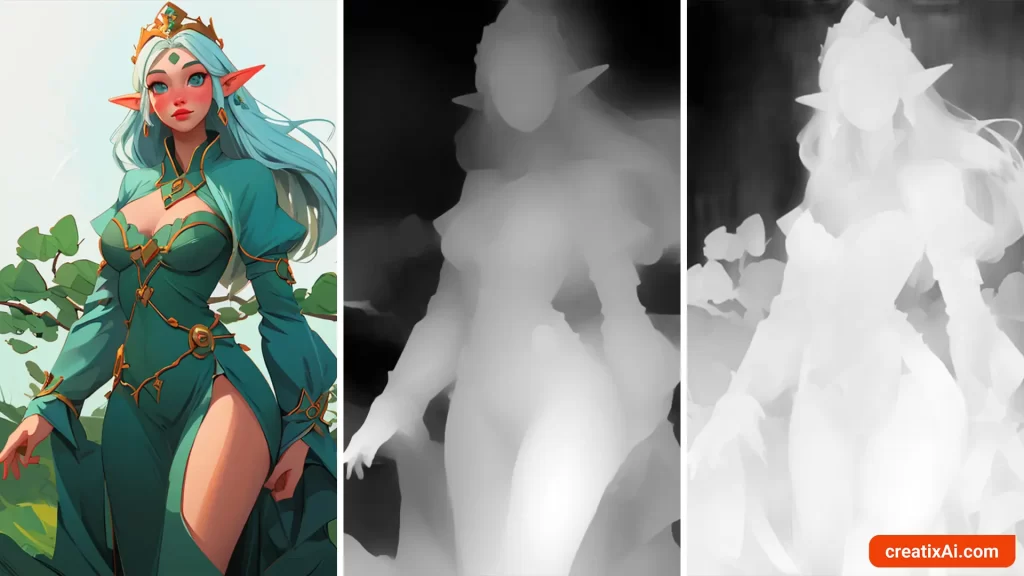
4 Depth Preprocessors Explained
There are four Depth preprocessors available for you to choose from in the dropdown menu.
- Depth Midas is the classic depth estimator that’s used by default with a lower amount of detail.
- Depth Zoe is a preprocessor with a moderate level of detail between Midas and Leres.
- Depth Leres has more details than the other two.
- Depth Leres++ generates the most amount of detail.
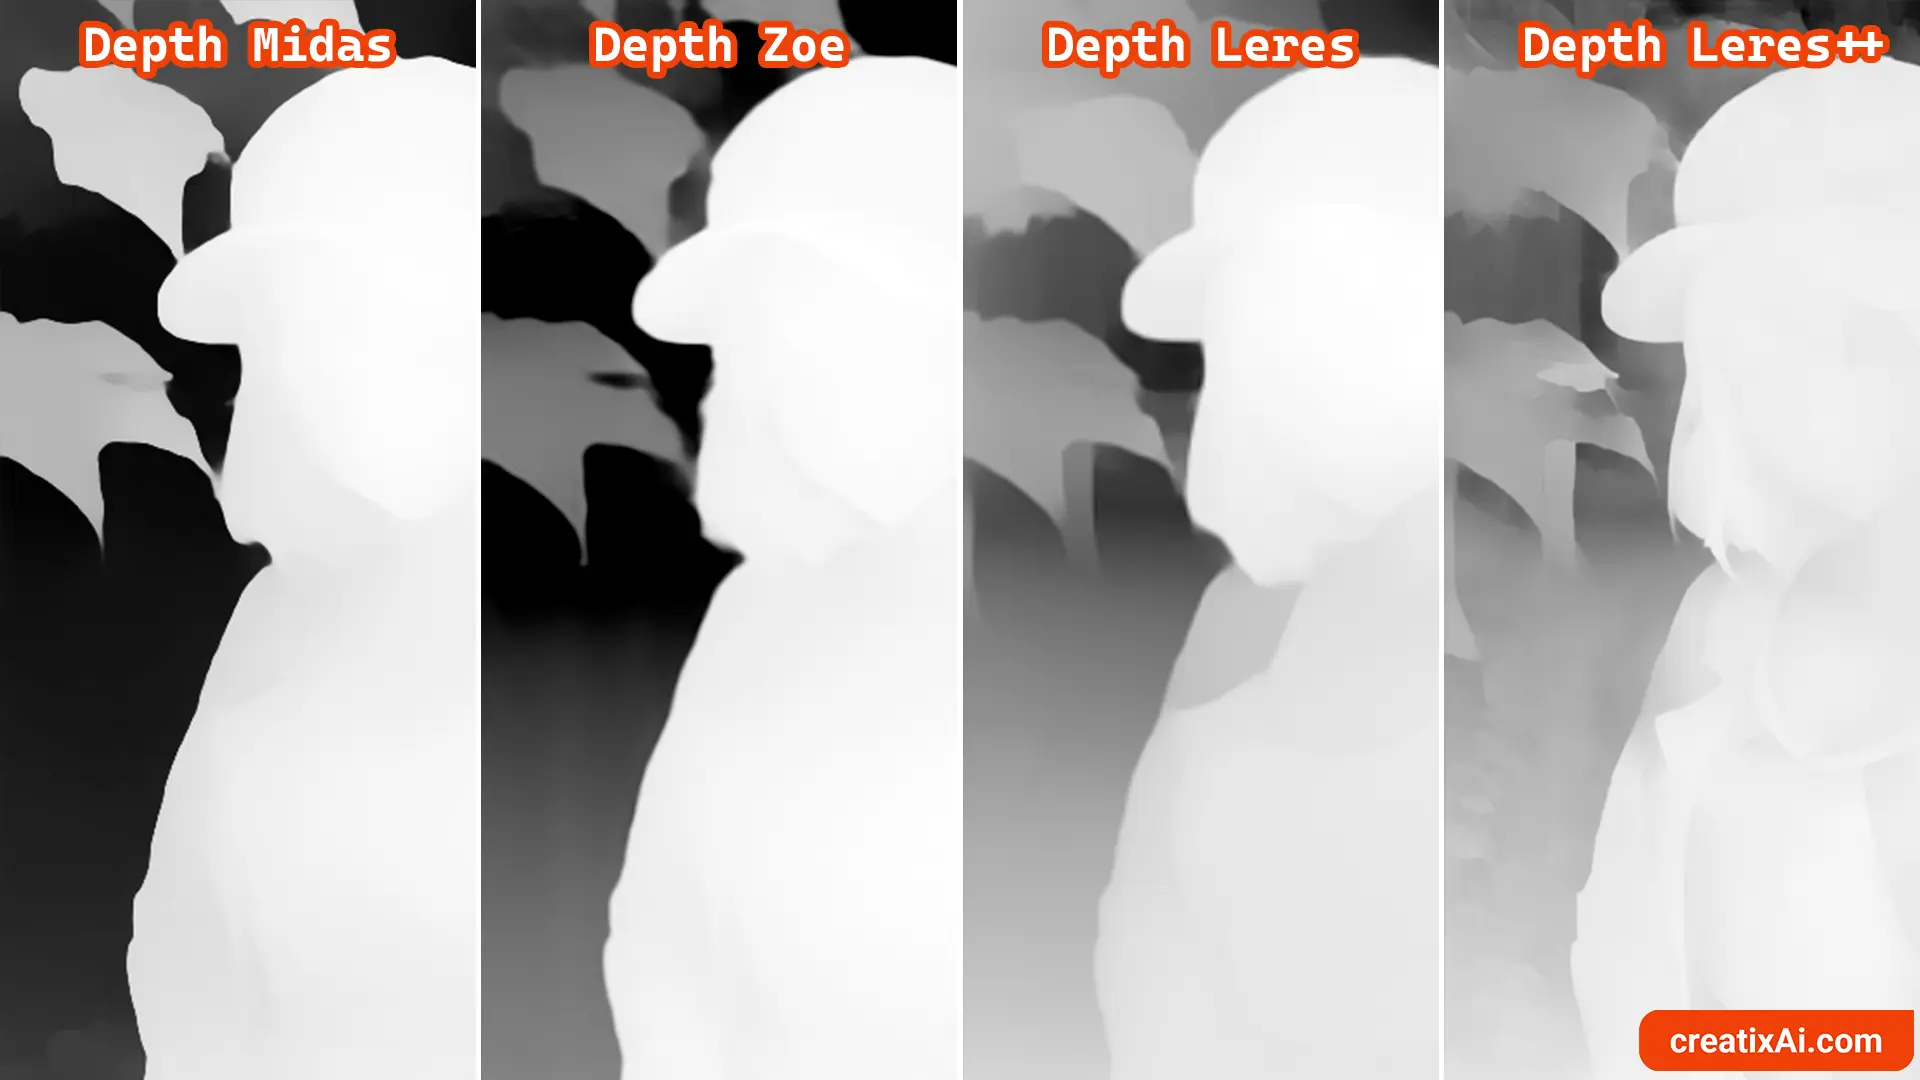
Notice how Depth Midas and Depth Leres++ have the sharpest object outlines, in comparison with the other two.
But is having more detail always better? I’m not sure.
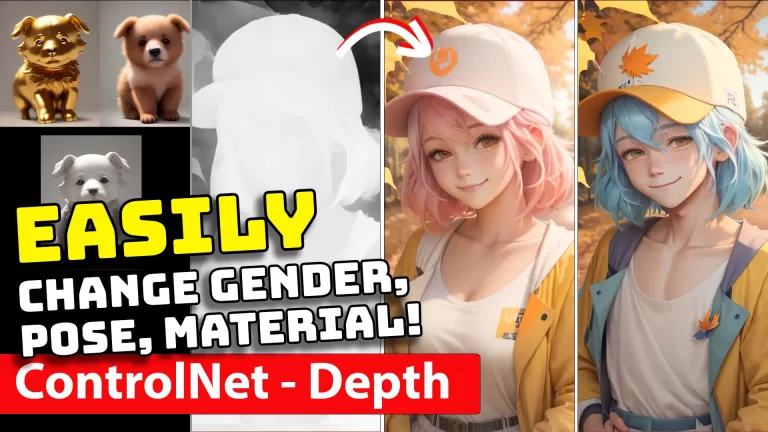
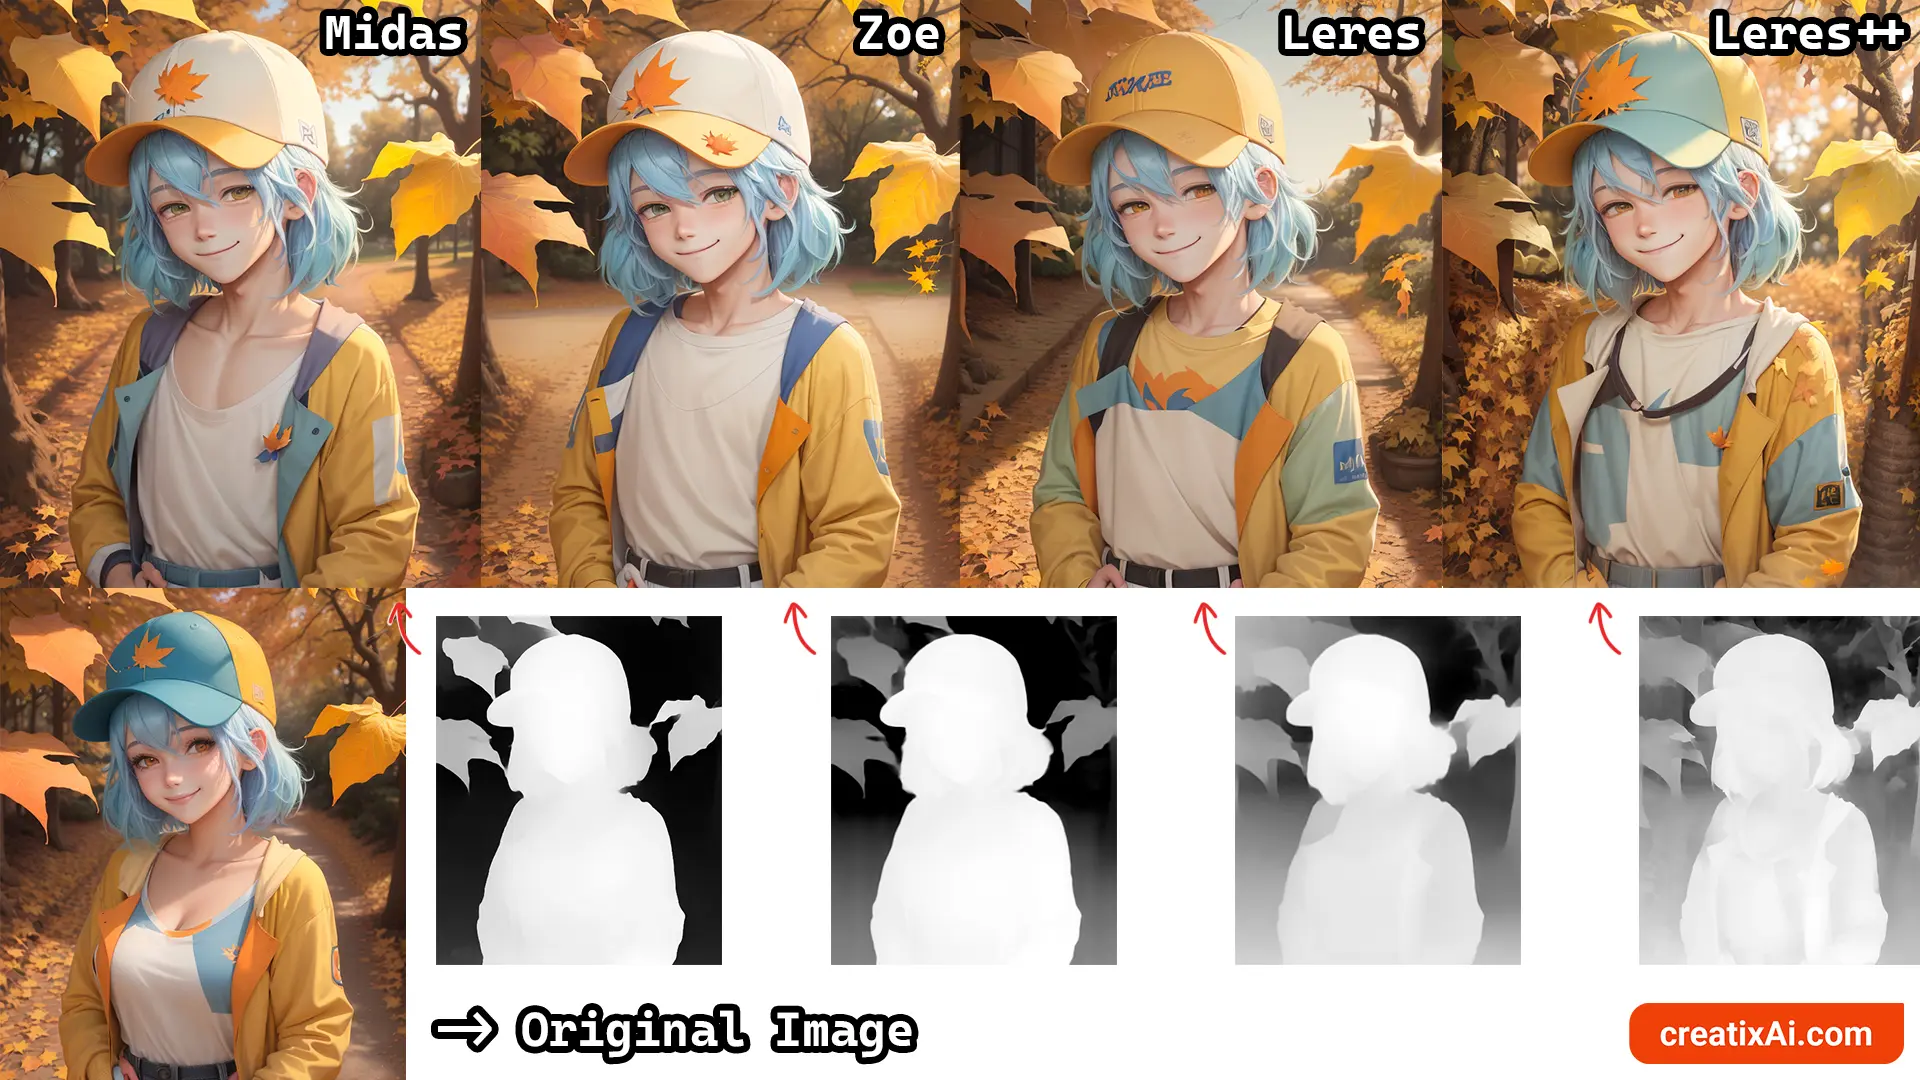
Let’s say I wanted to change a few specific color choices from an ai-generation I made. So I dropped the generated image into txt2img, so it has all of the same settings, prompts and parameters.
However, I made a change – blue hair -> pink hair; baseball cap -> white baseball cap.
The question is – which of these preprocessors can create the most close to the original generation with the changes I’ve made to the prompt. ControlNet – balanced.

As you can see, more detail is not better in this case, as the closest to the original with my changes included is Midas Depth.
In my opinion, Depth Leres++ produced the worst result of the four, with too much going on with the character and the background.
But what if we wanted to make a significant change – like, say, turn her into a boy?
So I changed the prompt: 1girl -> 1boy; and added a negative prompt: girl, woman.
Once again, we can see more details progression from left to right, but as to our goal of making a gender change – they all did well.
So, perhaps you should choose the Depth preprocessor depending on how close to the original image you want the new one to be and on the intensity of details you prefer.
ControlNet Depth – SDXL
The current standard models for ControlNet are for Stable Diffusion 1.5, but you can download extra models to be able to use ControlNet with Stable Diffusion XL (SDXL).
- Download any Depth XL model from Hugging Face.
- Make sure to select the XL model in the dropdown.
For my SDXL checkpoints, I currently use the diffusers_xl_depth_mid, but any from the above link should do.
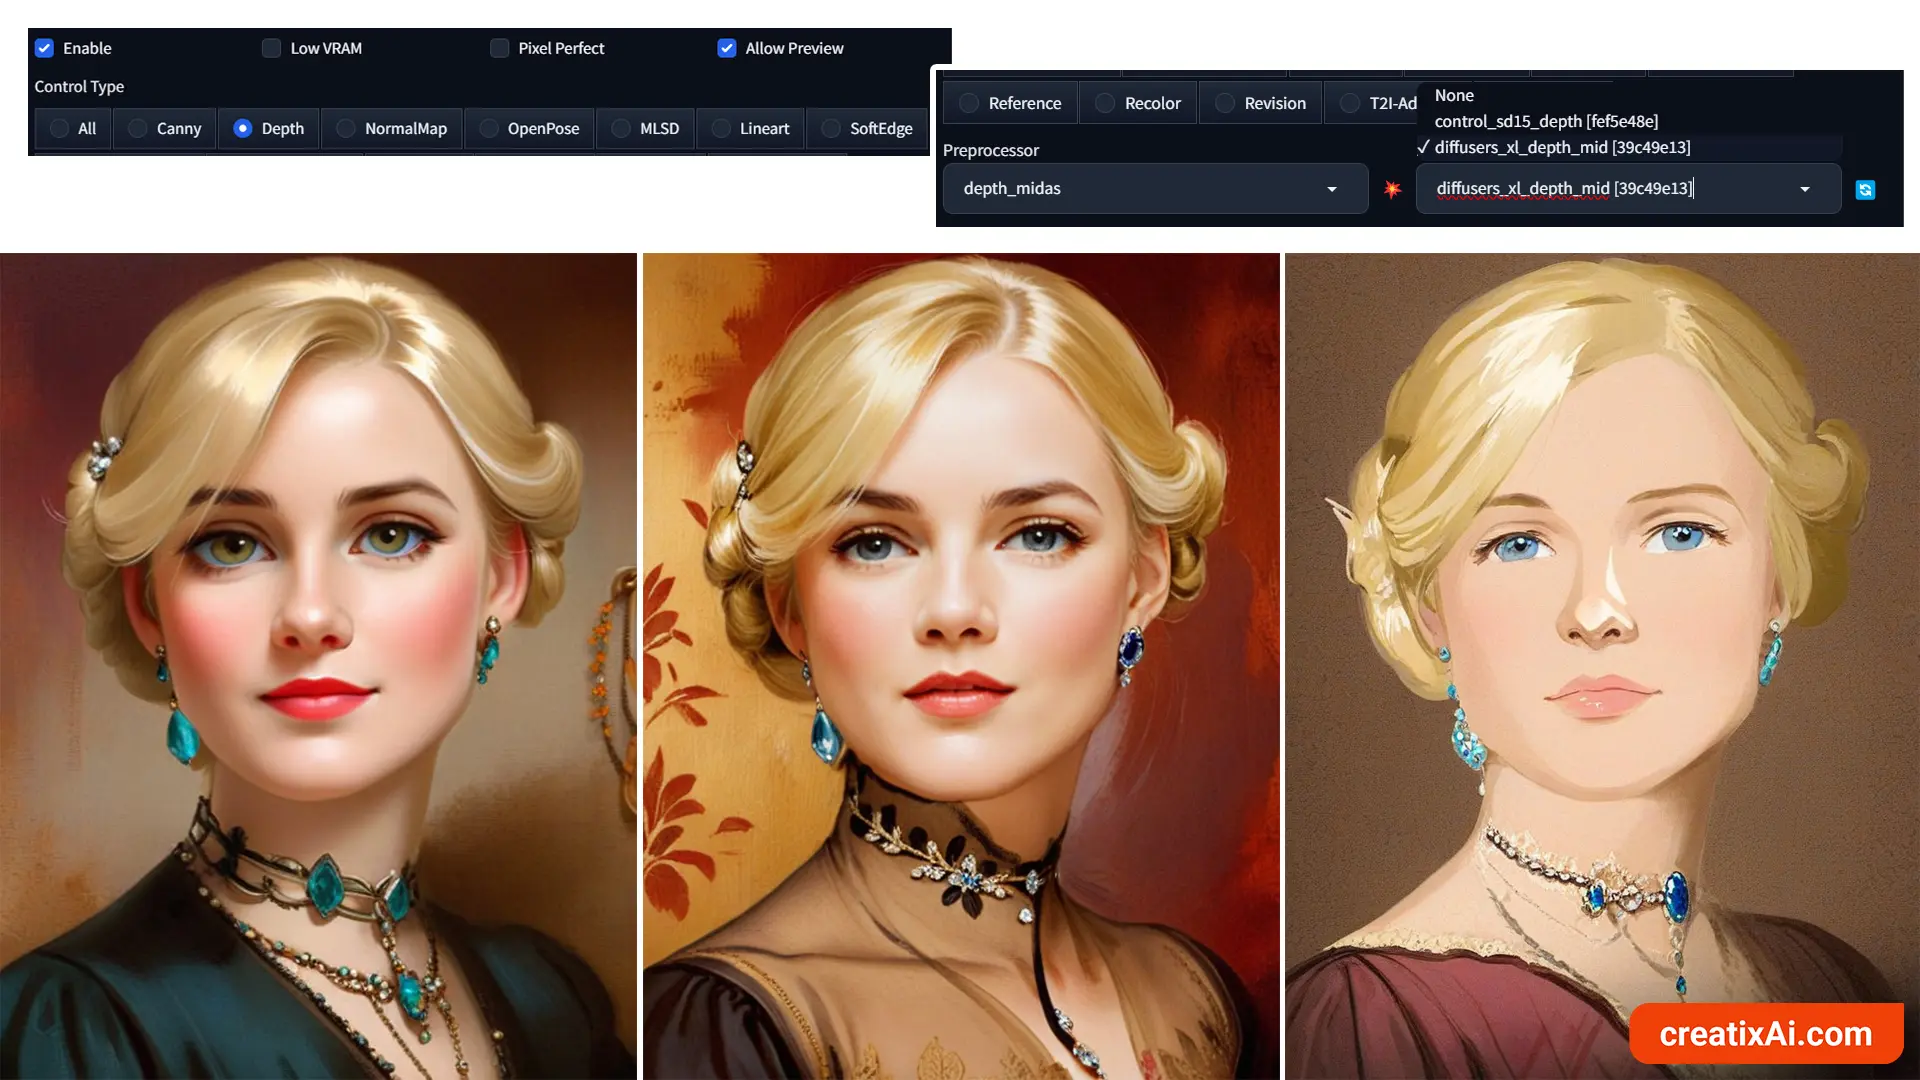
As you can see in the three examples above, I was able to use three different SDXL checkpoints with the ControlNet SDXL models.
It’s so interesting to observe how the Depth map affected the image composition, lighting and facial features.
ControlNet Depth Img2img
Scroll down to the ControlNet section in the Img2img tab in A1111 to use this powerful feature with other images.
For example, you could transform a picture you like into something else while keeping the same composition and colours with the img2img.
If you want to keep the same colors and only change the image slightly, then use a lower denoising strength; the higher the denoising strength, the less your reference image will impact the new image.
If you want to use ControlNet with the same image that you drop into the Img2img tab, you won’t need to upload it again inside ControlNet; just checkmark “Enable”.
Then, change the prompt to whatever change you want to make and generate.
- Example: gold statue, paper statue, bear, cat, bunny – I added these one at a time to the original prompt.
I used 0.9 denoising strength and 0.8 ControlNet Depth weight for most of the images below.
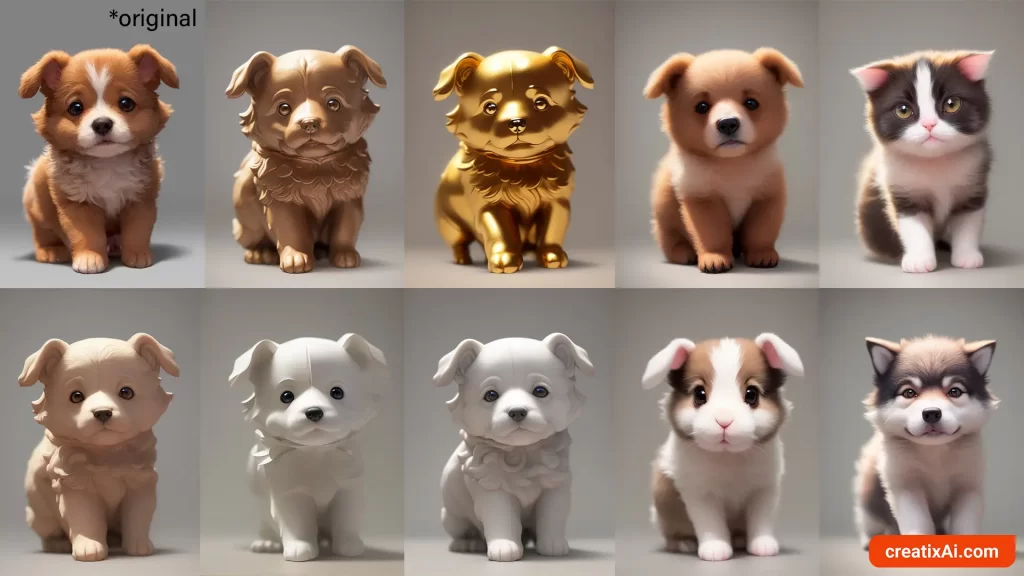
Though, I had to lower the ControlNet Depth weight to 0.4 for the cat and the wolf to get pointy ears, instead of the droopy dog ones. So, playing around with the weight will have a big impact on how believable a change is in some cases.
How cool are the results of using Img2Img with ControlNet? These AI generations look stunning!
ControlNet Depth for Text
You can use ControlNet Depth to create text-based images that look like something other than typed text or fit nicely with a specific background.
I used Canva, but you can use Photoshop or any other software that allows you to create and export text files as JPG or PNG.
Here’s what the process looked like:
- Create a text-based image to use for Depth.
- In Txt2Img do the usual settings, write a prompt, and pick the size ratio of the text image you created.
- Drop in the text image inside ControlNet and select “All”
- In the pre-processor choose “Invert”
- In the model choose Depth.
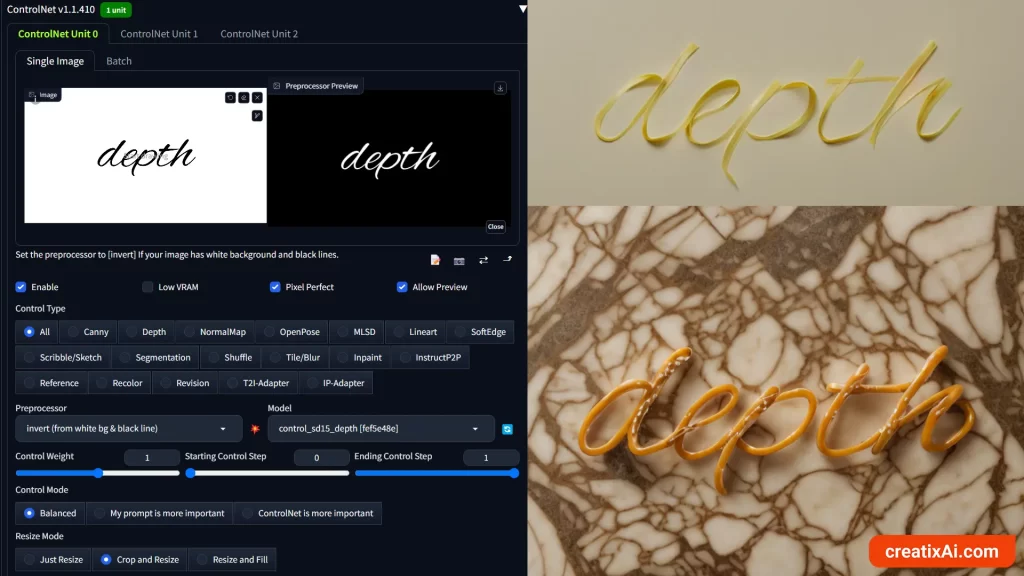
The first prompt is pasta noodles on a white table, and the second is pretzel on a marble table.
You can see how the depth and the stark difference between white and black translated into these results. Looks pretty cool, right?
You could use it to make your social media posts, presentations, book covers and so much more!
For some images, the text will not transform but rather fit in with the environment.
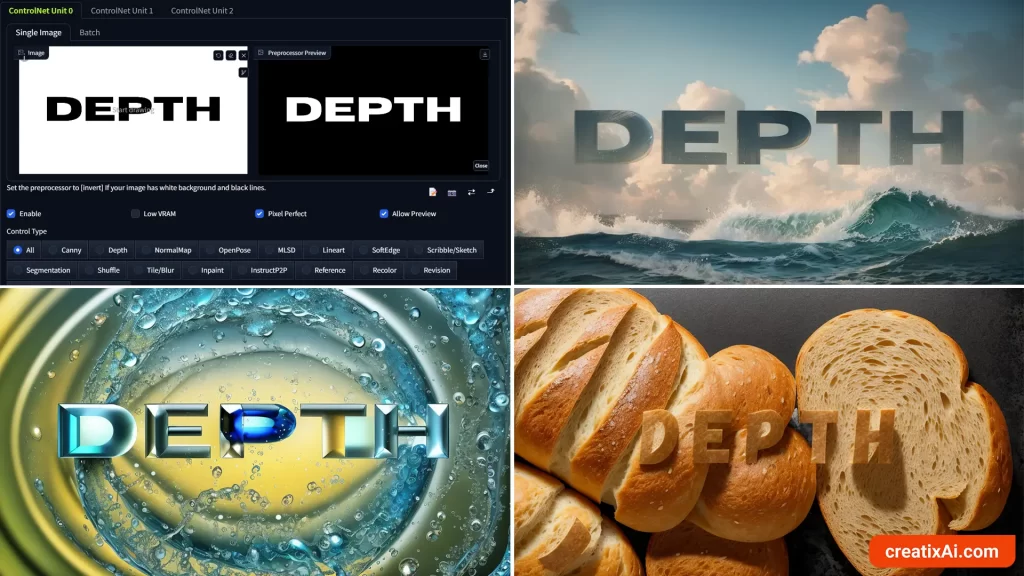
Also, note how different fonts will work better for some things and not others.
Flowy handwriting will work great with something like pasta, pretzels, shoelaces, etc.
Meanwhile, wide and bold fonts will work great for rocks, ice or to fit in with the environment.
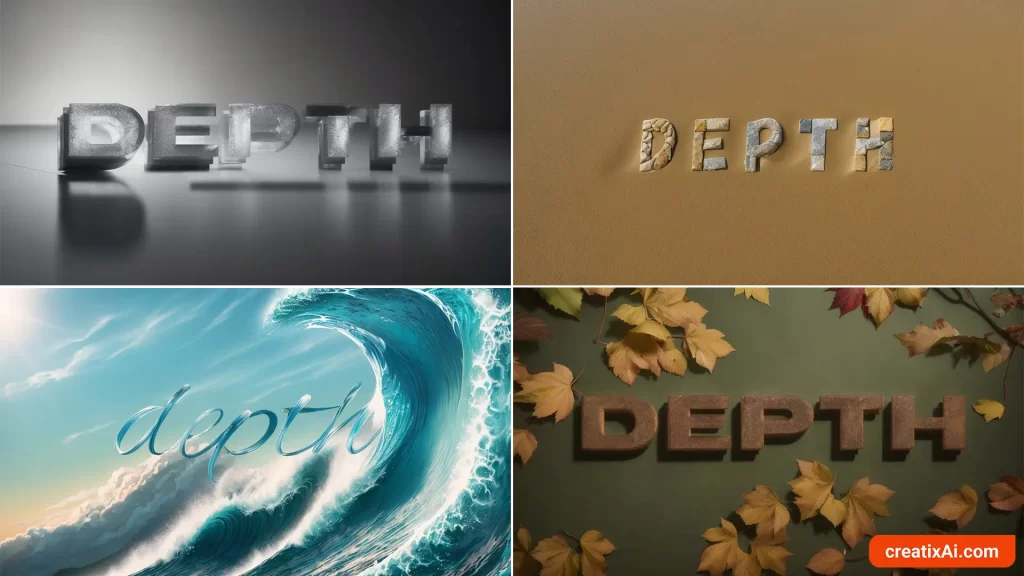
Looking at these now, they would work well as wallpapers, don’t you think?
- Learn more about Ai Text Effects with Stable Diffusion in the linked article.
ControlNet Depth for Poses
ControlNet Depth can be used to replicate specific poses.
And while you have an option to use OpenPose, it might not always work correctly, so it could be worth trying to go for Depth.
The process is exactly the same as before, and you can use txt2img or img2img, depending on what you want to go for.
In the example below, I used txt2img and a reference photo from Unsplash.
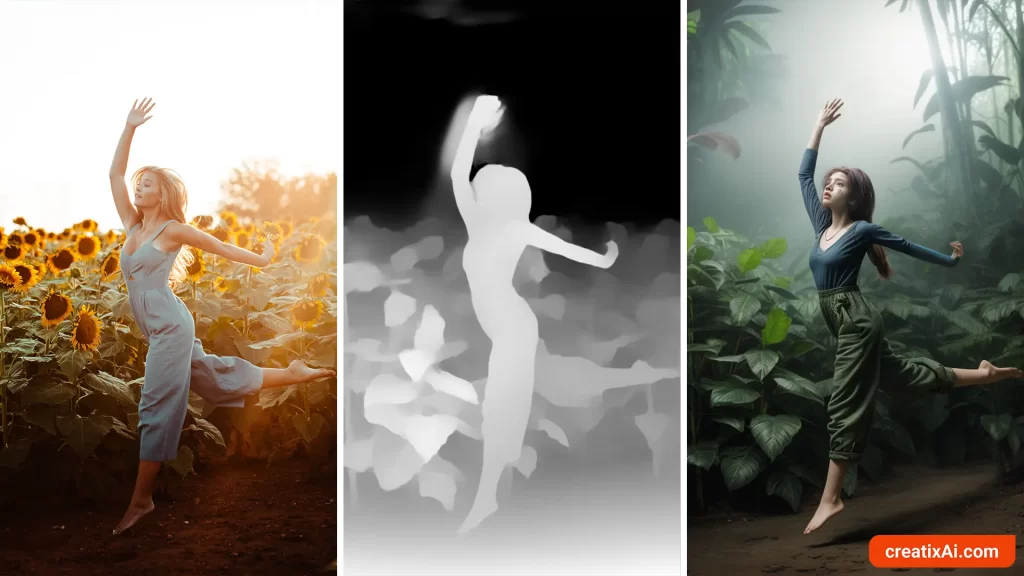
If you watch the video, you’ll see I had to Inpaint the hands and the face, and even then, the results weren’t perfect. But I did use an awkward pose and an overexposed image on purpose to see how well it does.
If you use a well-lit photograph with a simpler pose and find a good seed for it, the results can be really great!
You could also use a tool like MagicPoser to create your own pose or use a preset and go from there.
ControlNet Depth for Composition
Using ControlNet for composition seems like the most obvious choice, and that’s its main use in my opinion, really.
Still, you can add some creativity to the mix and really push the ability of:
Ai + ControlNet + You = new, unique creations.
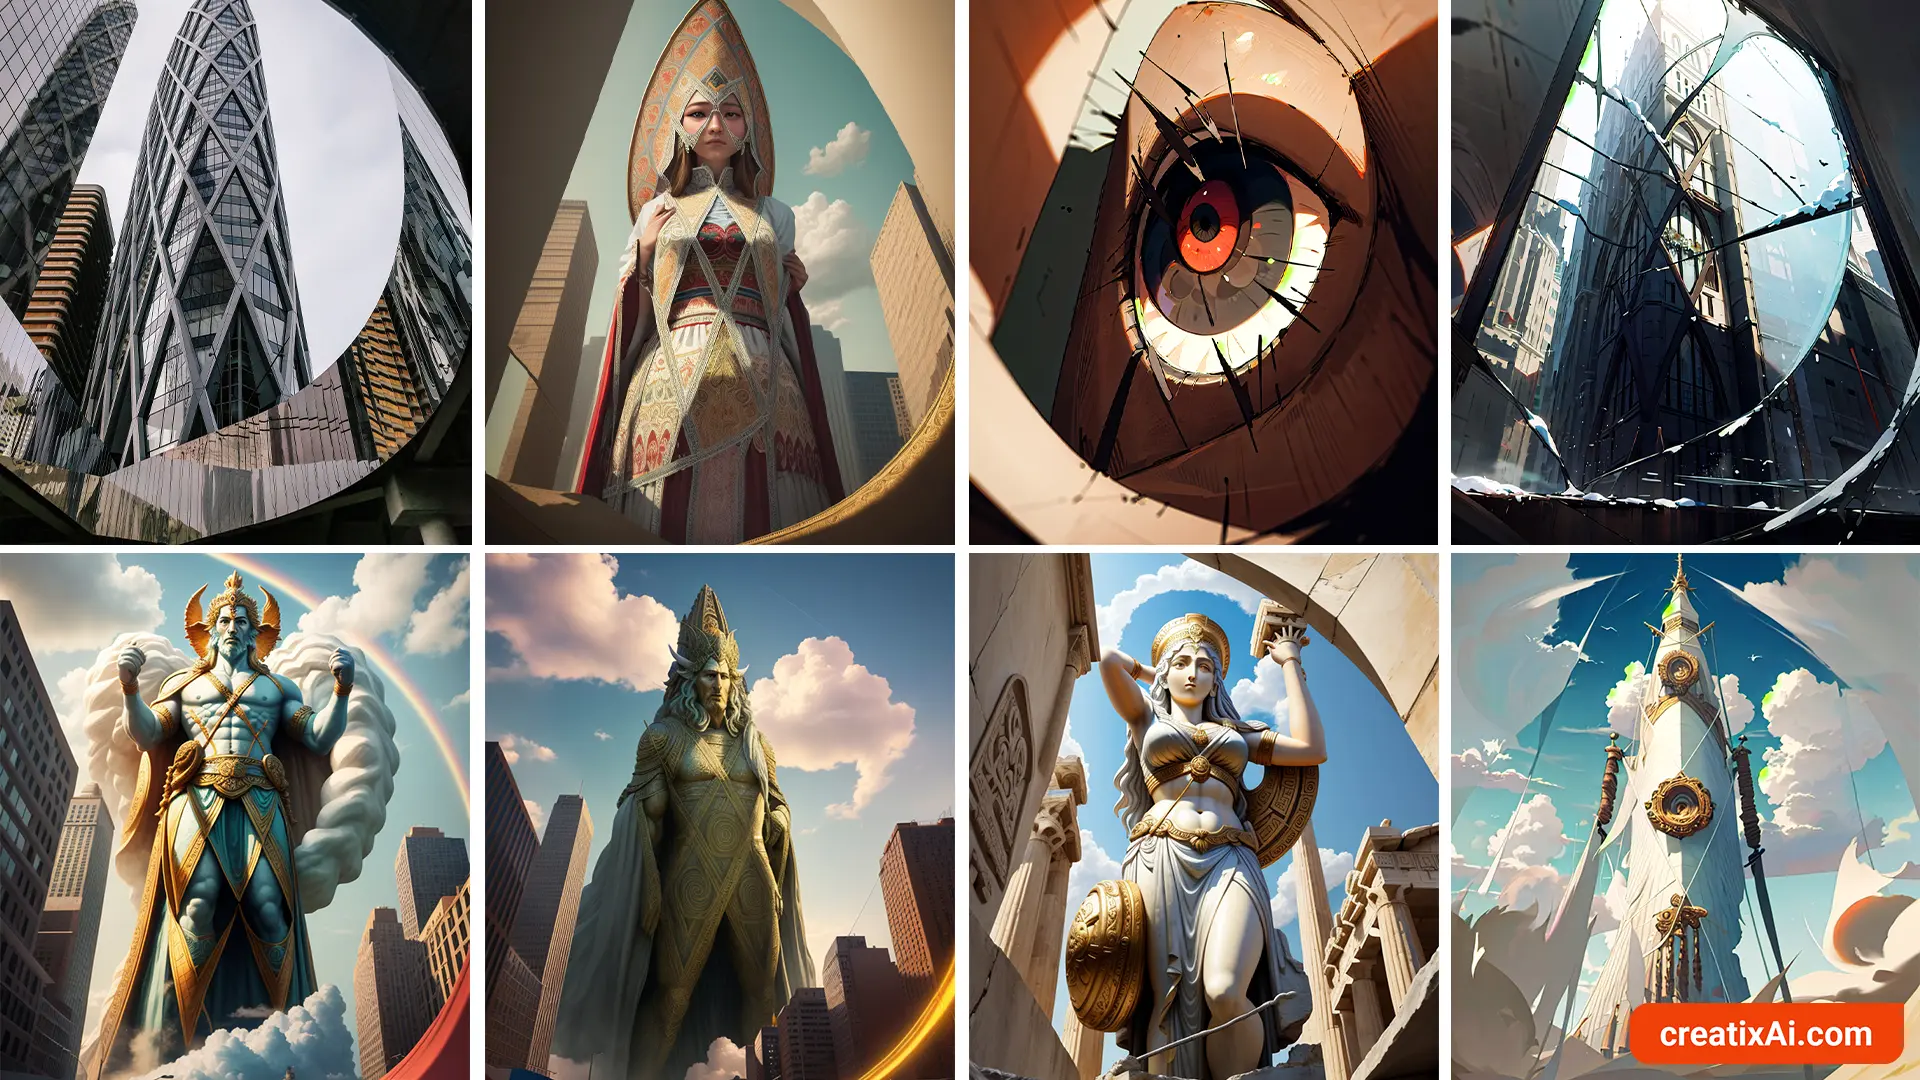
One way of doing it is by grabbing references of compositions you really like and then reimagining them yourself or letting Stable Diffusion make something up.
For example, I found this photo of buildings with an interesting composition and used Stable Diffusion and ControlNet Depth to reuse that similar composition but with different subjects.
I hope you enjoyed this ControlNet Depth Tutorial.
Let me know in the comments what is your favorite way of using Depth in Stable Diffussion!