Turn your favorite anime characters realistic with the help of Stable Diffusion! I’ll share three ways to turn anime characters life-like in this guide.
To make this happen, you must have Stable Diffusion installed (follow the linked guide if you haven’t already).
I’ll be using Demon Slayer characters for this tutorial. Let’s dive in!
From Anime to Real – 3 Ways
First of all, you need to pick a checkpoint to use for these generations.
I recommend using a checkpoint that can do both anime and realistic stuff, like Photon, RevAnimated or FantasticMix. I’m sure there are others, but from the many I’ve tried – these three are the best.
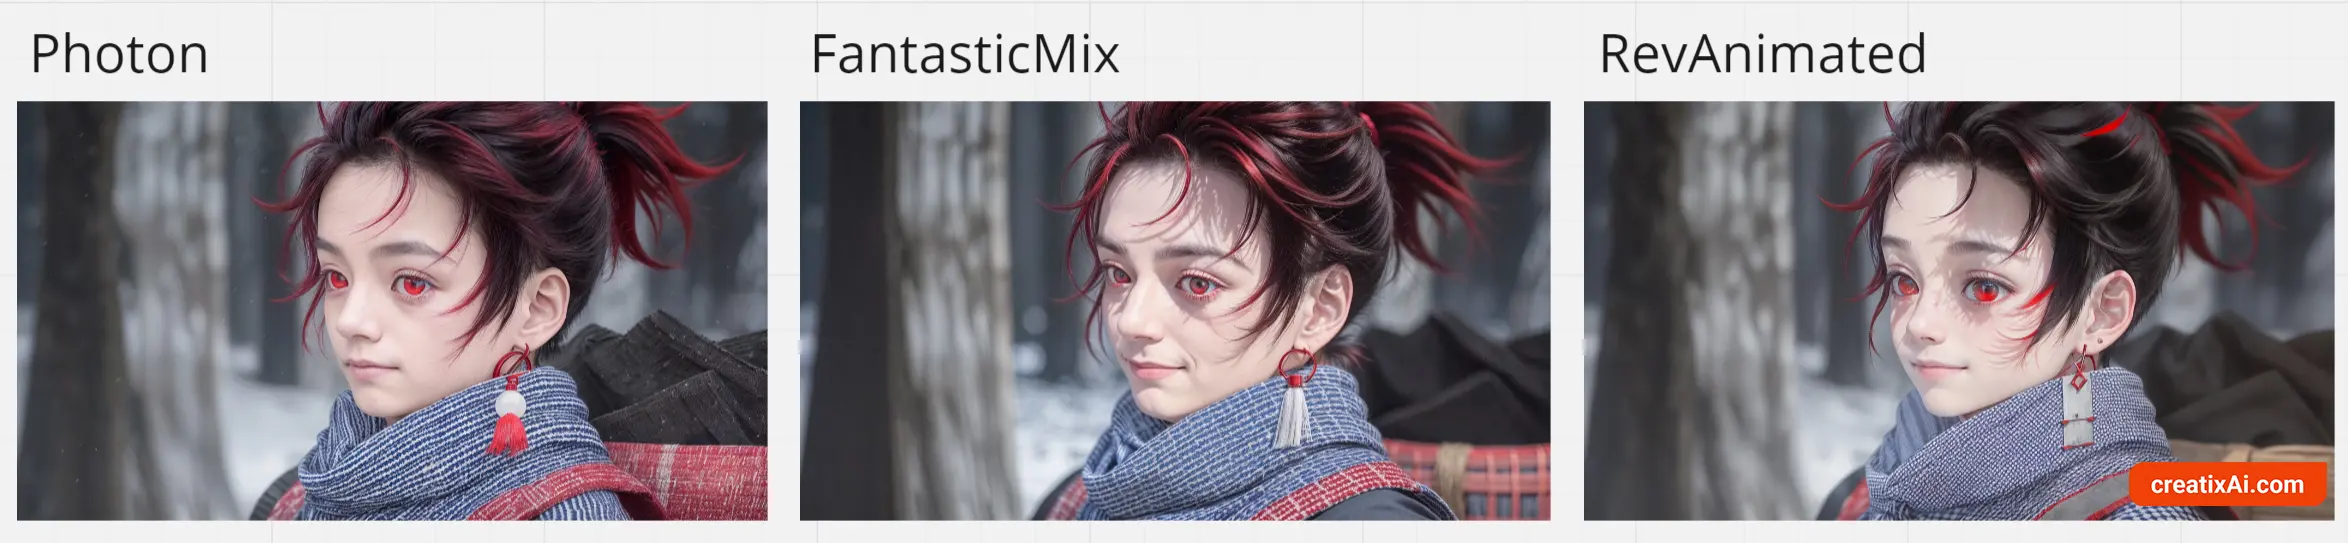
Below is an overview of the three ways to turn anime characters realistic.
We will discuss them in detail further in the article.
- By the way, if you want a great checkpoint to generate anime-style images, check out my list of 12 favorite anime models.
#1. ControlNet
ControlNet is an advanced feature that adds a lot more control and variation to your ai-image generation. Frankly, I think it’s one of the most powerful tools developed for Stable Diffusion so far.
It’s my favorite way of turning anime characters into realistic people.
After much testing, I found the best settings to tweak so each image turns out great. I’m looking forward to sharing them with you.
#2. Img2Img
The Img2Img tab in A1111 is a wonder for many purposes, including turning your anime characters realistic.
I definitely use and recommend this way for most images.
It doesn’t take too many resources or time, and you have a lot of control over the final image by tweaking different parameters as you go.
#3. LoopBack
Loopback is a script available inside Automatic1111. It’s an easy way to get some interesting results, but you have very little control over how the final image will look.
Also, it takes quite a lot of time and resources to pull off.
It’s not my favorite way, and I rarely use it. But others do, so I thought I’d share the knowledge with you, and you can try it for yourself!
Using Loopback to Turn Anime Characters Real
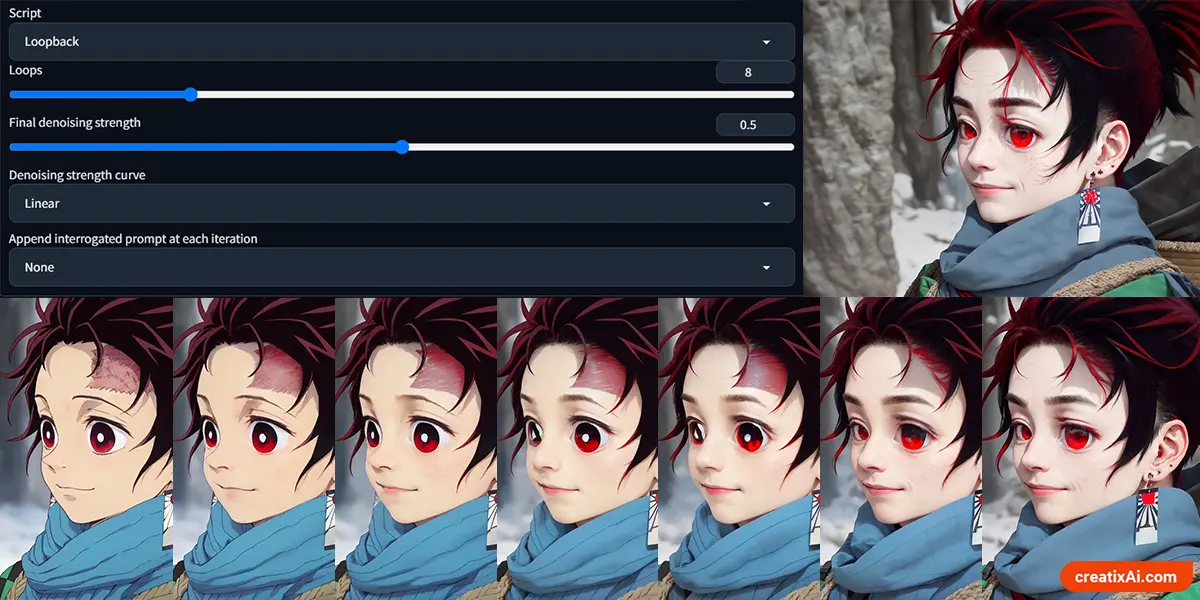
As I said before, Loopback is my least favorite method, although easiest to explain. So, I will start with it to get it out of the way.
- Go to the Img2Img tab.
- Scroll down to Scripts
- Select Loopback
- Change Loops to 8-10
- Keep final denoising strength at 0.5
Now, write your prompts using words like “realistic, photography, etc”, and maybe add in some negatives like “anime, cartoon, painting, etc.”
Select the anime image, change the size, sampling method and your checkpoint.
In the Denoising Strength, I’d play with the slider and set it between 0.25 and 0.4.
Then click generate and watch the magic happen. Who knows? It might just work out.
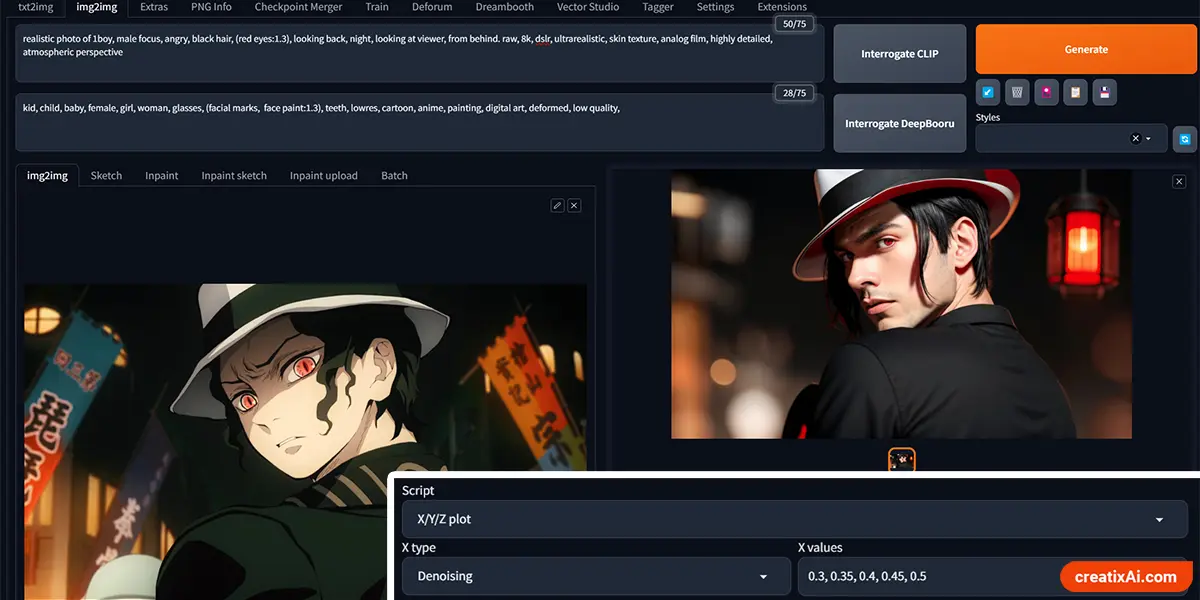
Using Img2Img to Turn Anime Characters Real
A great way to change the style of your image is by using the Img2Img feature in Automatic1111.
Pick a checkpoint, write a prompt and drop in your image. Play with all the usual settings as you see fit, but pay close attention to the Denoising Strength.
Denoising Strength – think of it as how much you want to “blur” the original image before stable diffusion re-constructs it with the other settings you set.
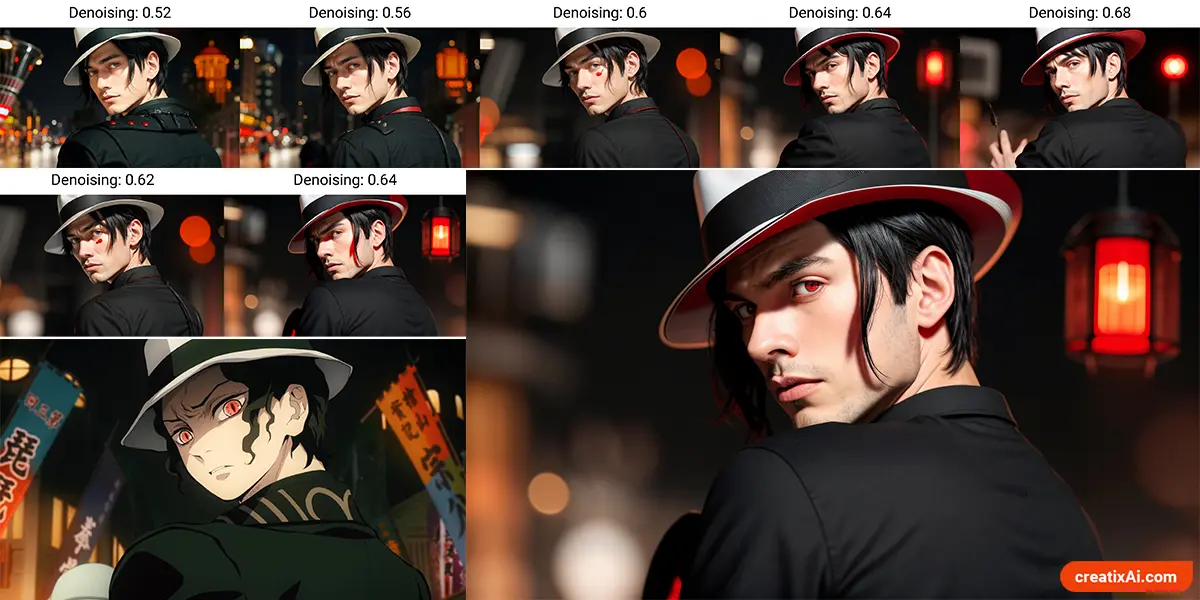
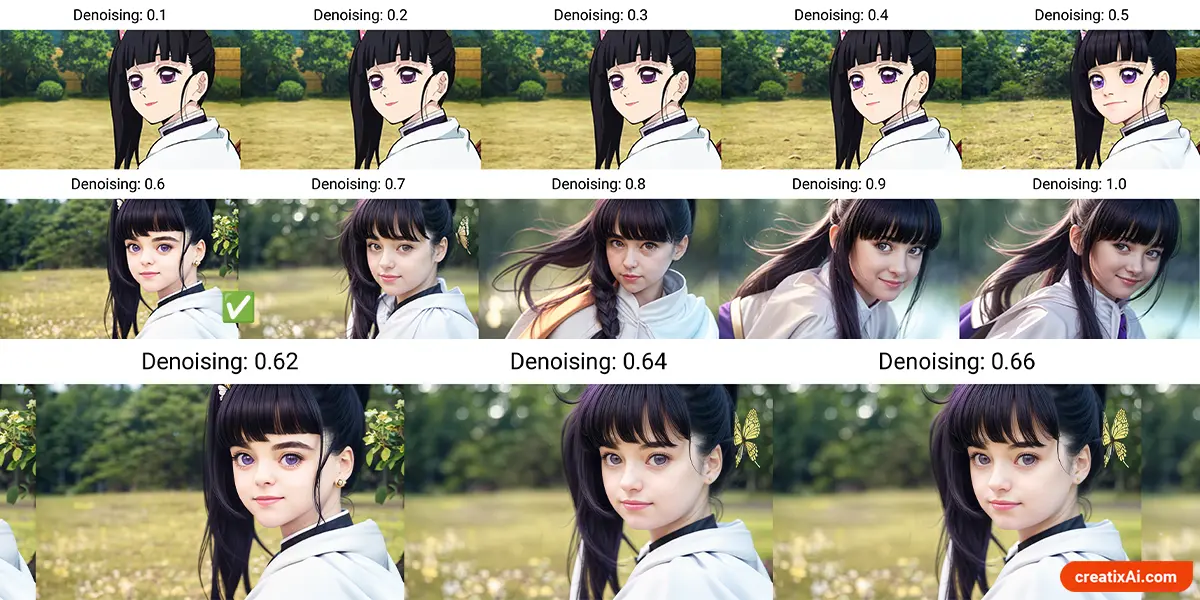
You can also use the XYZ plot in the Scripts section to set different denoising options if you don’t want to do it manually.
You can start by testing the denoising strength in increments of 0.1: 0.1, 0.2 … 0.9, 1.
When you find around which denoising strength the image makes the changes you like, you can test it further, like 0.5, 0.52, 0.54, etc. Until you find something that you like.
And that’s how you use Img2Img to turn anime-style characters into life-like realistic people!
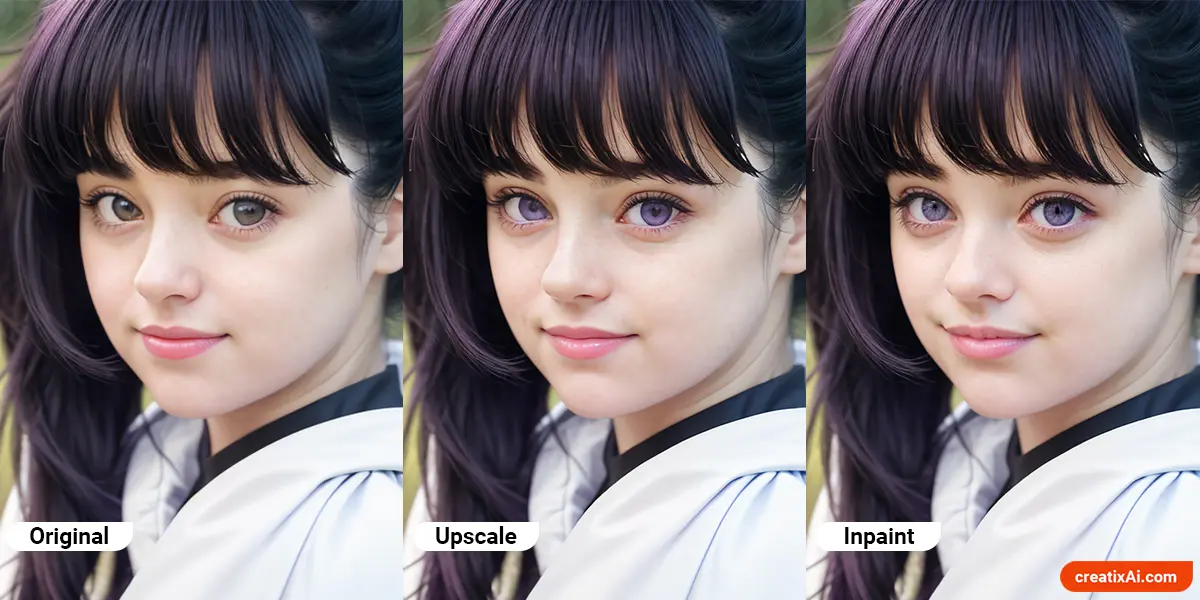
You can use many methods to make your ai-generated image have better quality. One of my favorites is:
- Send the image to the “Extras” tab and upscale it by 2 (for example). In this case, I used ESRGAN_4x and Postprocess upscaler 2: 4x-UltraSharp at 0.5 visibility.
- Now send it to Inpaint, color in the face, change to “masked only,” and I used a size 1000x1000px.
- Play around with denoising strength. I like to go around 0.2-0.4.
In the example below, I first inpainted the face to turn the eyes purple before upscaling it in the Extras tab, but you can omit this step and fix it after upscaling.
Using ControlNet to Turn Anime Characters Real
ControlNet is an incredibly powerful tool for ai-image generation with Stable Diffusion. I’ve tested it with many different settings and found some that work wonderfully for turning anime characters realistic.
Installing ControlNet
If you don’t have ControlNet installed yet, here are the steps to do so:
- Go to the Extensions tab.
- Select the Install from URL tab.
- Paste the link below into the URL for extension’s git repository field:
https://github.com/Mikubill/sd-webui-controlnet
- Click the Install button.
- Wait for the message saying the extension is installed.
- Visit the ControlNet models page.
- Download all (or some) model files (ending with
.pth). - Put the model file(s) in the ControlNet extension’s models directory.
stable-diffusion-webui\extensions\sd-webui-controlnet\models
- Restart AUTOMATIC1111 webui.
After installing ControlNet, you’ll see a new collapsible section called ControlNet. Find it in the text2img and img2img tabs right above the Script tab.
Also, for some of these, I use a T2I color adaptor. It must be downloaded separately and placed in the same folder as the other models. You can download different T2I models here.
- t2iadapter_color_sd14v1.pth – is the one I used.
Adding more ControlNet Models
For the purpose of this tutorial, you might want to adjust how many ControlNet models you can use at a time. I recommend setting it to 2-3. To change the max models amount:
- Go to the Settings tab.
- Find and click ControlNet on the left sidebar.
- Find the slider called Multi ControlNet: Max models amount (requires restart).
- Move the slider to 2 or 3.
- Scroll back up and click Apply Settings.
- Finally, click Reload UI.
Now, you should be able to see ControlNet Unit 0, ControlNet Unit 1, and maybe ControlNet Unit 2 in the ControlNet section.
ControlNet Settings for Anime to Real
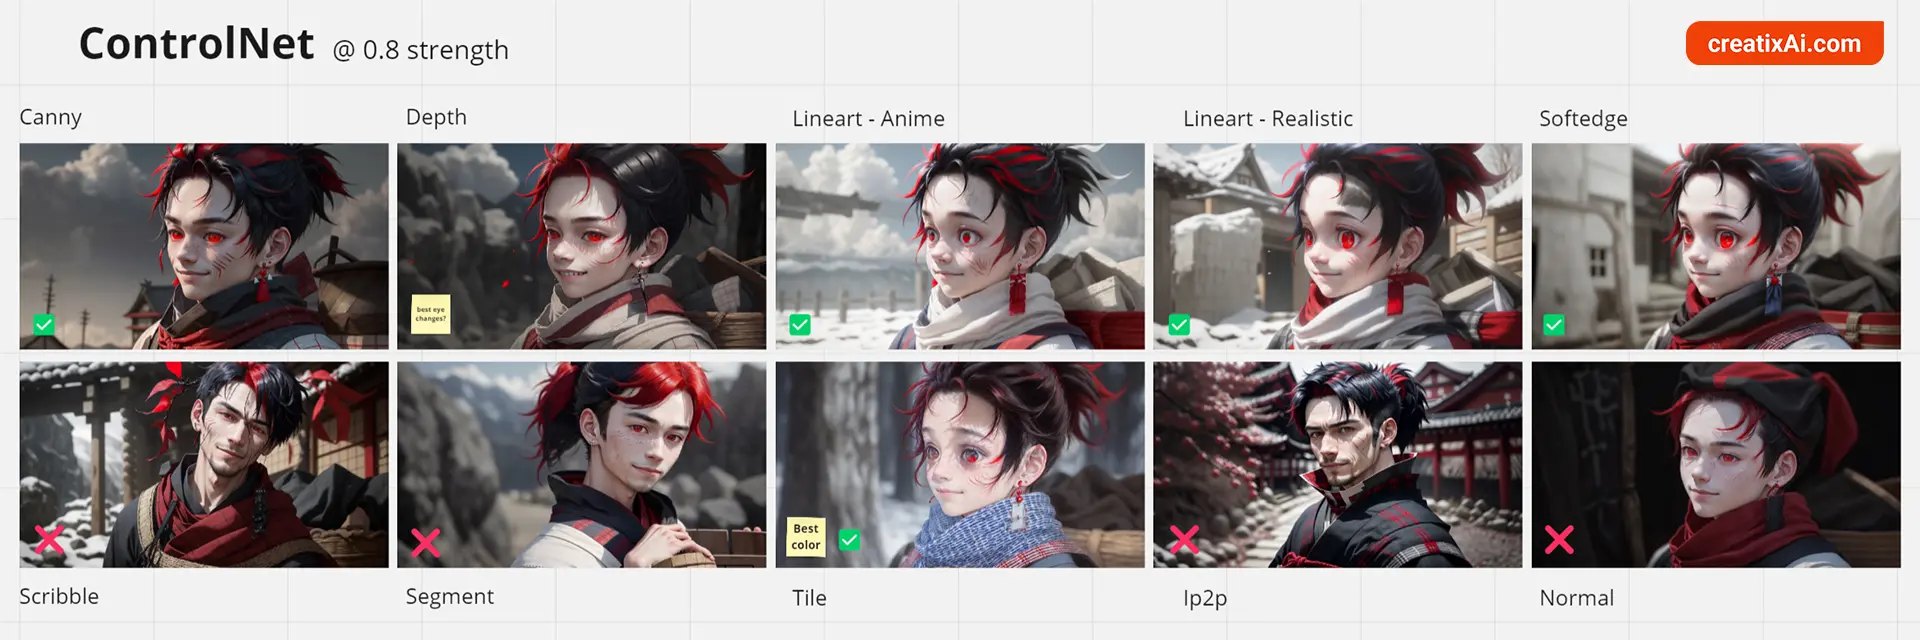
I’ve tested all of the ControlNet models to determine which ones work best for our purpose.
The truth is, there is no one size fits all, as every image will need to be looked at and worked on separately.
Still, some models worked better than others:
- Tile
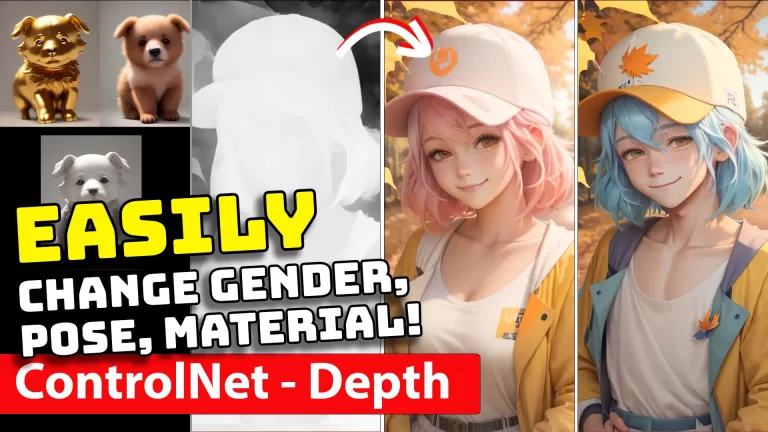
- Depth
- Lineart Realistic
- SoftEdge
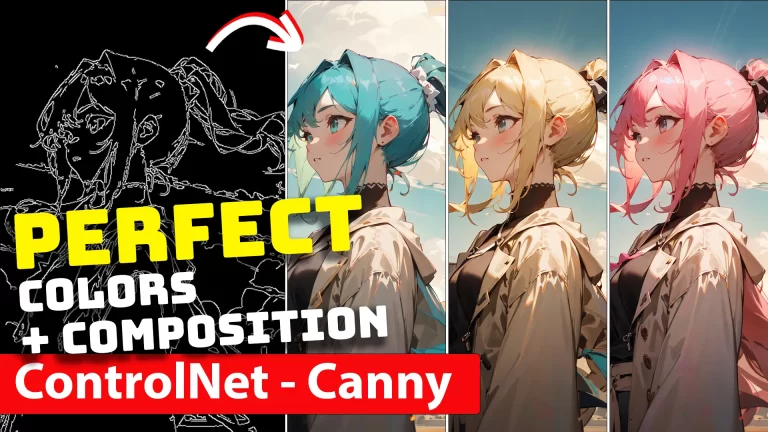
- Canny
- T2I Color
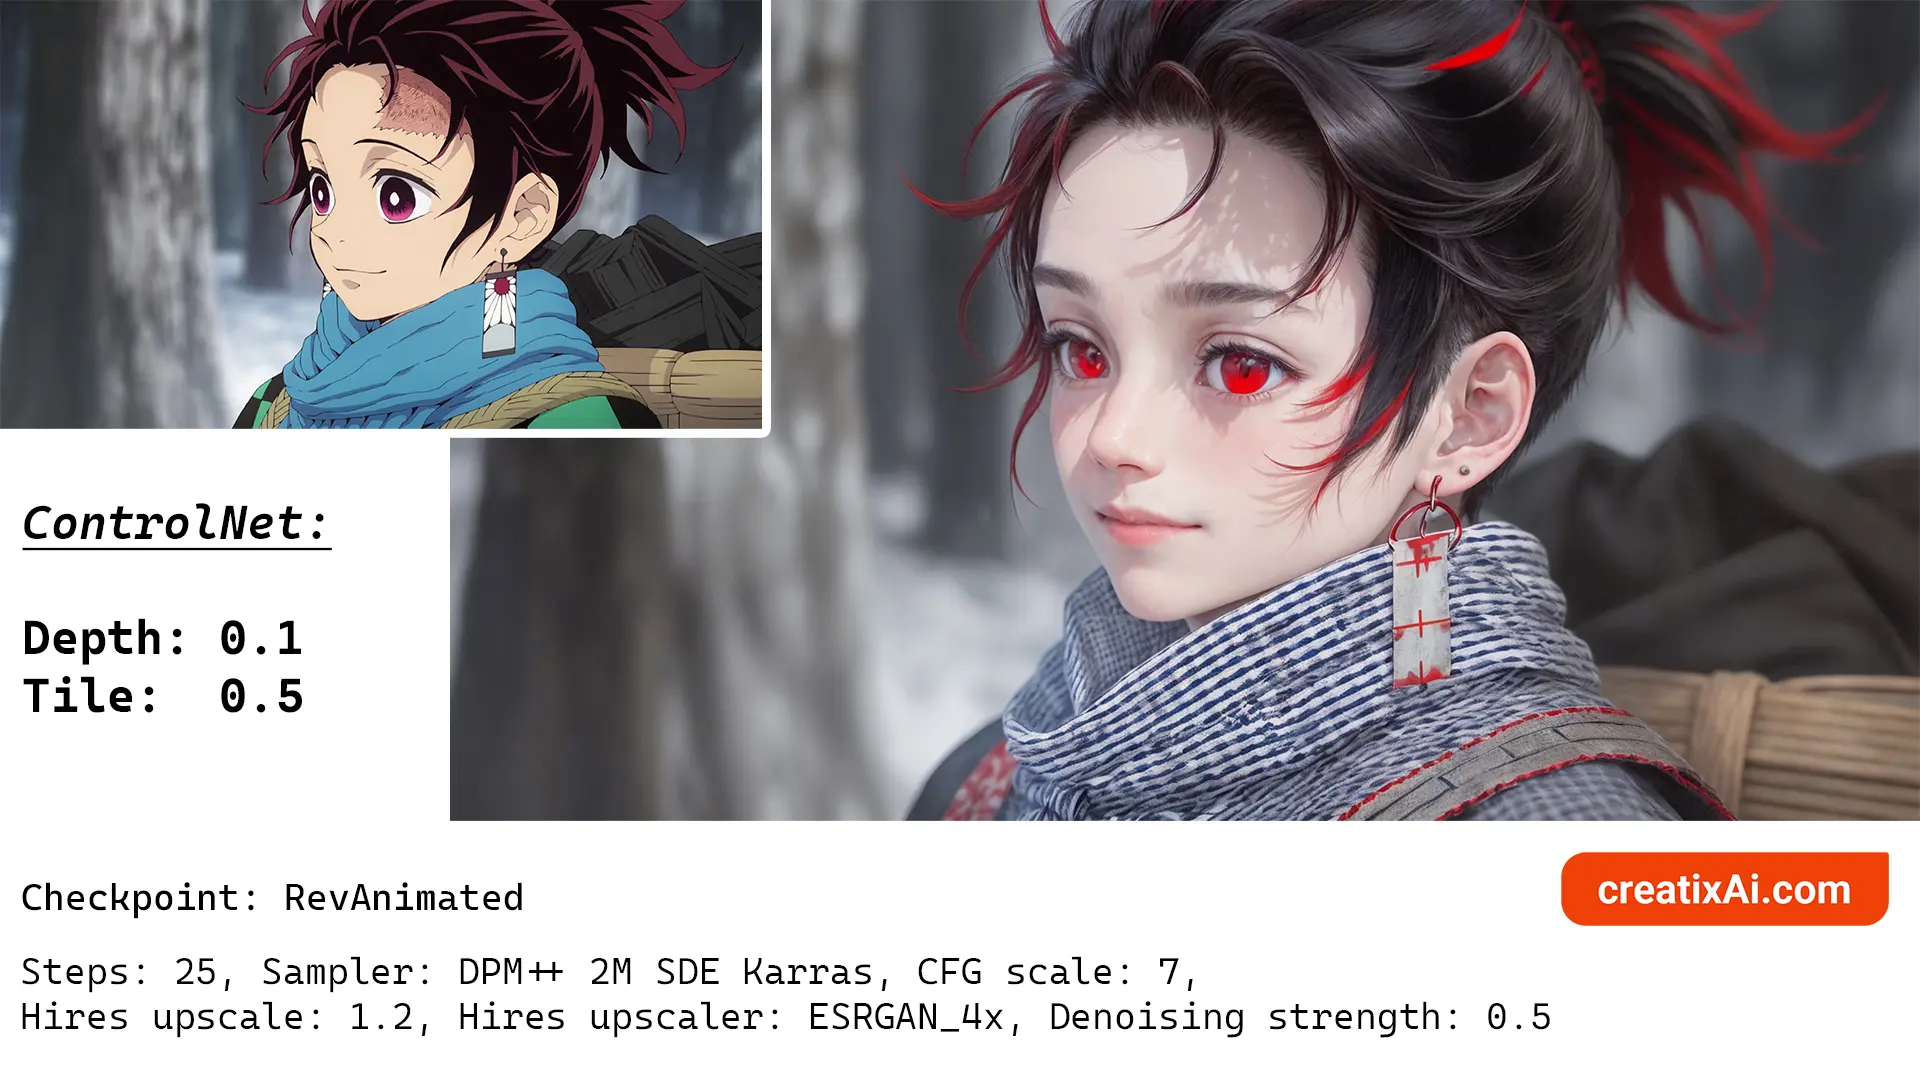
I would start with the Tile model and play with its ControlWeight slider. Then, test it with the other models I mentioned one at a time until a satisfying result.
This will take time, but sometimes the results are so worth it!
Here are some of the results I got with the settings used:

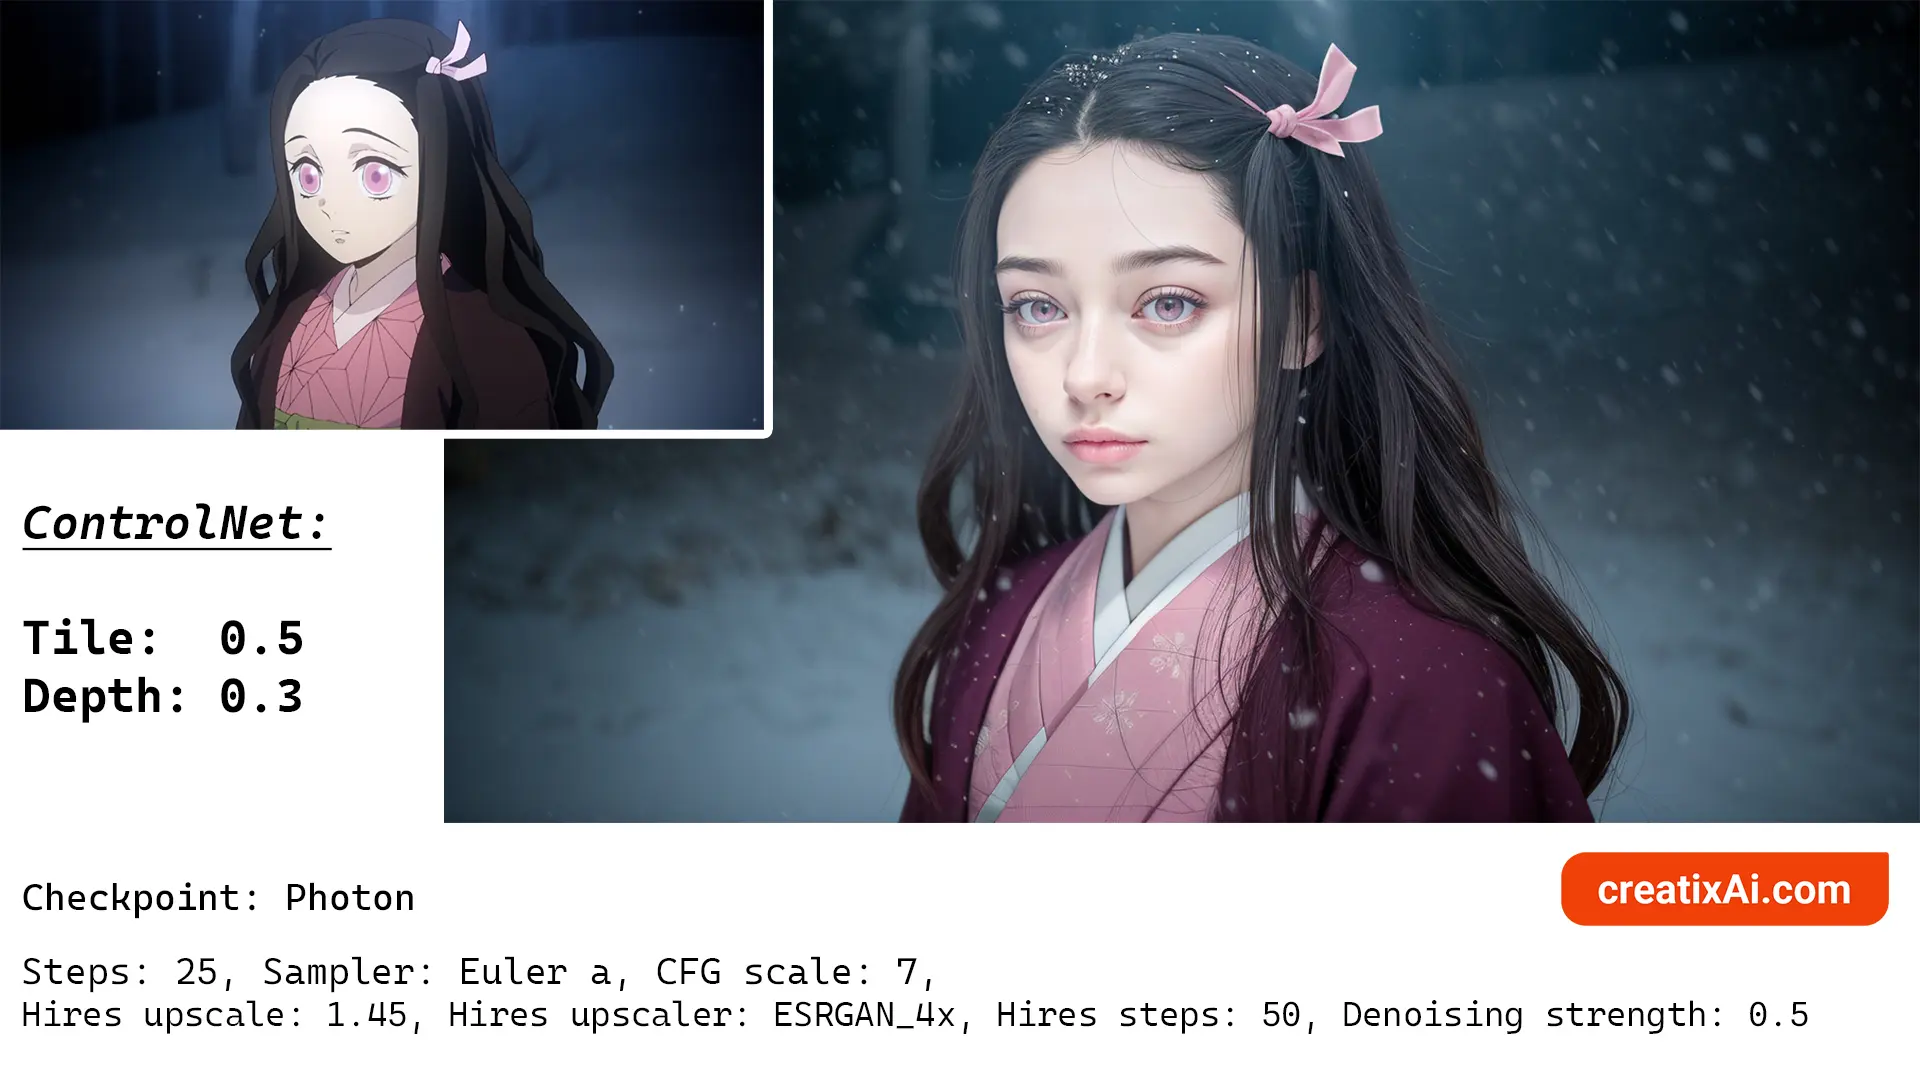

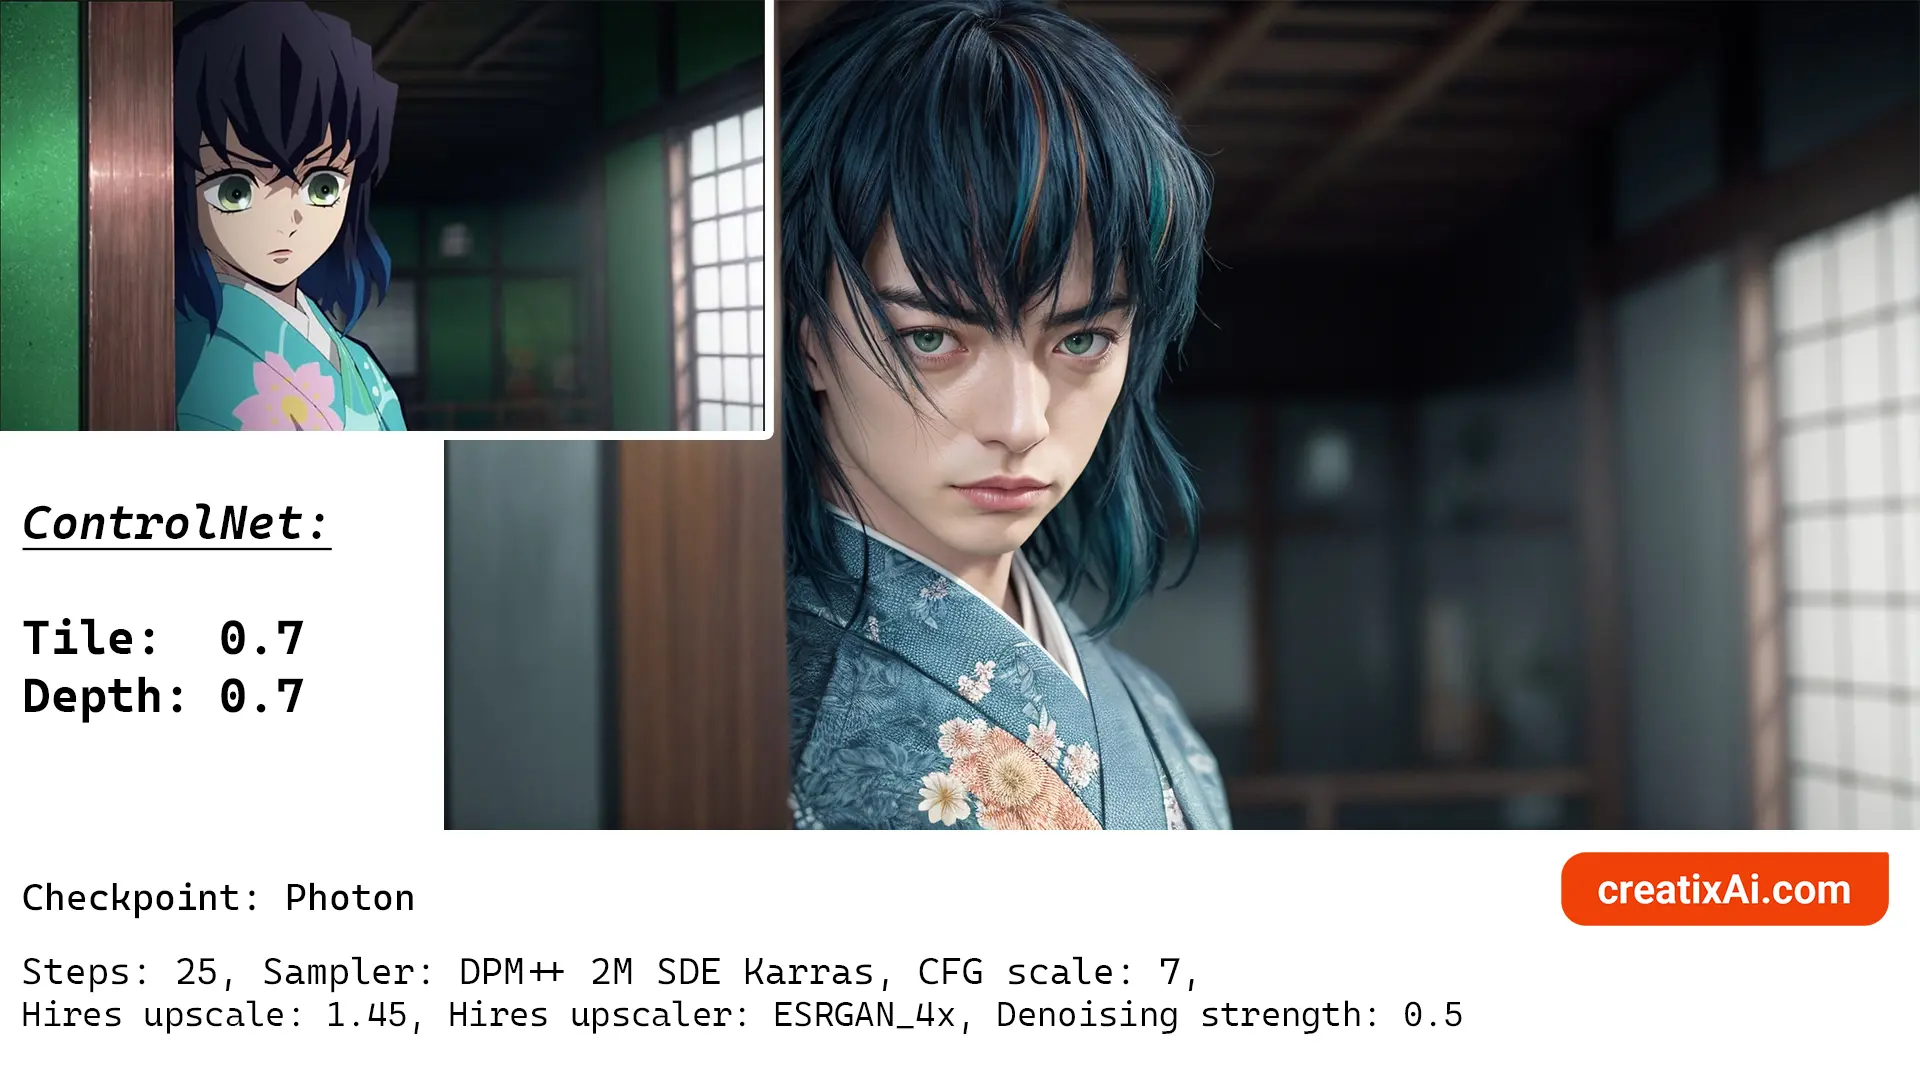
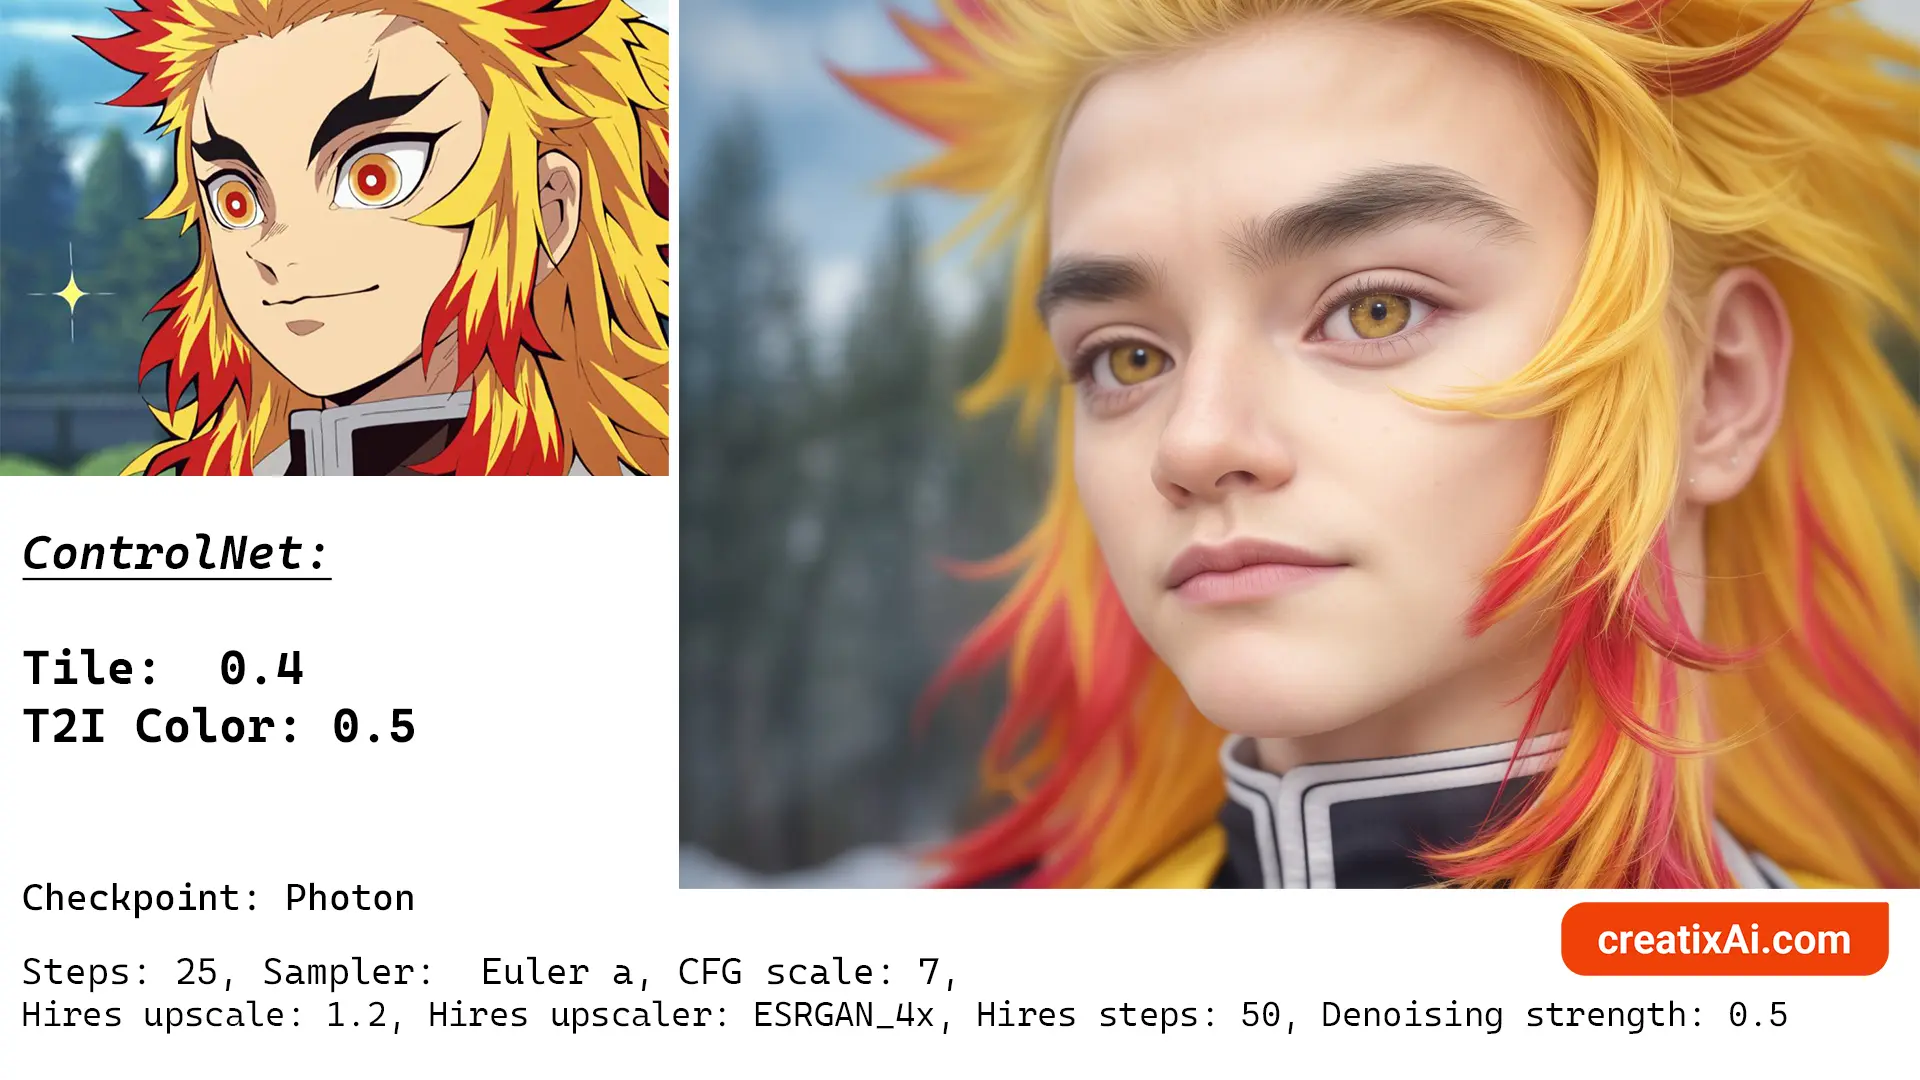
If you find that everything works great except a particular part, most often the face, then use Inpainting to fix it. And use the upscaling method I shared with you previously for best results.
Now you know how to turn anime-style characters into real-life people! Hope you have fun with these methods and see which one you like best.
Questions? Leave them in the comments.
One Response
Can you explain what the difference is in using ControlNet between txt2img and img2img? I saw you switch between the two in your youtube video and wasn’t sure why.