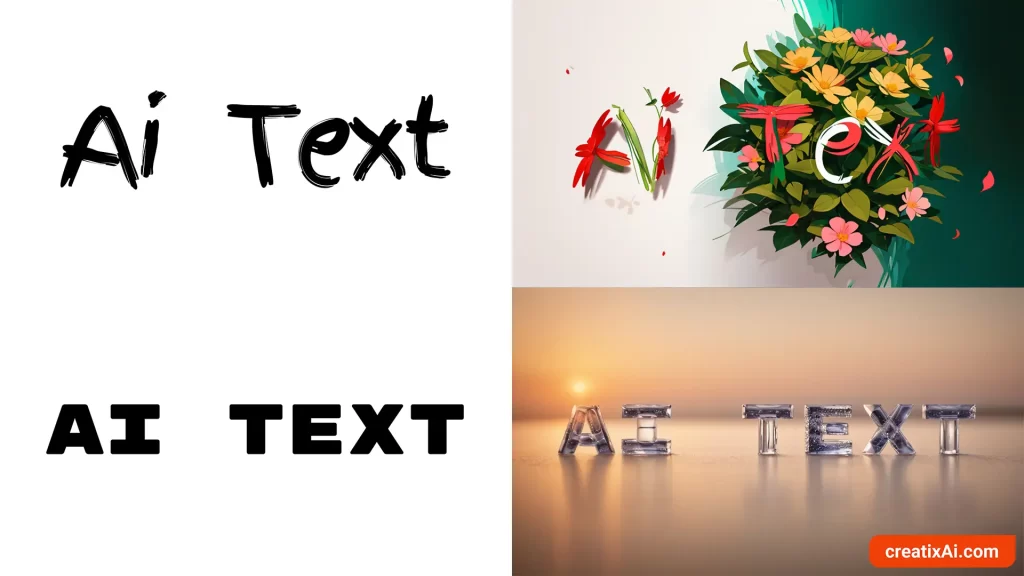
Create awesome AI text effects using Stable Diffusion, ControlNet and Automatic1111. Follow this easy tutorial and step-by-step guide to create cool-looking text like in the examples below.
By the way, I made a video about Ai text Effects in Stable Diffusion with ControlNet. If you prefer watching instead of reading, check it out below:
Installing Software
To create AI text effects using Stable Diffusion, you will need to have two things installed:
- Install Stable Diffusion with Automatic1111. Follow the linked tutorial for the instructions.
- Install ControlNet and download the Canny Model.
To install and use ControlNet, we will be installing this extension for your Automatic1111 Webui.
If you already have it installed, keep scrolling for a guide on how to use it.
- Go to the Extensions tab.
- Select the Install from URL tab.
- Paste the link below into the URL for extension’s git repository field:
https://github.com/Mikubill/sd-webui-controlnet
- Click the Install button.
- Wait for the message saying the extension is installed.
- Restart AUTOMATIC1111 webui. (close and reopen the terminal)
After installing ControlNet, you’ll see a new collapsible section called ControlNet. Find it in the text2img and img2img tabs right above the Script tab.
- Go to ControlNet-v1-1 models page to download the model’s .pth files. You need them to run ControlNet!
- NOTE: make sure the model version matches the ControlNet version, or ControlNet might not be working properly! So check this place sometimes for updates.
- Place the model file(s) in the ControlNet extension’s models directory.
stable-diffusion-webui\extensions\sd-webui-controlnet\models
- Visit the ControlNet SDXL models page to download extra models for SDXL checkpoints if you want.
- You can also download extra T2I models for color, style and others from here.
- Refresh the models list to see your new options.
Note: the model we will be working with today is Canny – so make sure to have it installed.
Preparing Text
Before you can generate cool-looking text effects inside Stable Diffusion, you need to prepare some .jpg or .png files with the text you want to transform.
For this, you can use Photoshop, if you have the subscription or Canva – it can be used for free!
I used Canva for all of the following examples.
- Create a new empty page in the size you want to generate AI art with. I used 1920×1080, but any will work; just remember the ratio for your later generations.
- Type in the word you want to use – it can be anything! But the more words you include, the harder it will be for SD to get all the letters correctly.
- Pick a font that will complement your idea.
For example, a handwritten font would work great for ropes, noodles and vines. While a blocky, thick font will do great with rocks, bread, ice cubes, etc.
If you want the text effects to be the main point of an image, make it large and centred. On the other hand, you can make it smaller and placed to the side if you want other elements or portraits inside also.
How to Make Ai Text Effects
Now that you have your text files prepared, it’s time to open up Stable Diffusion and drop the text image inside ControlNet.
Here’s what the process looked like:
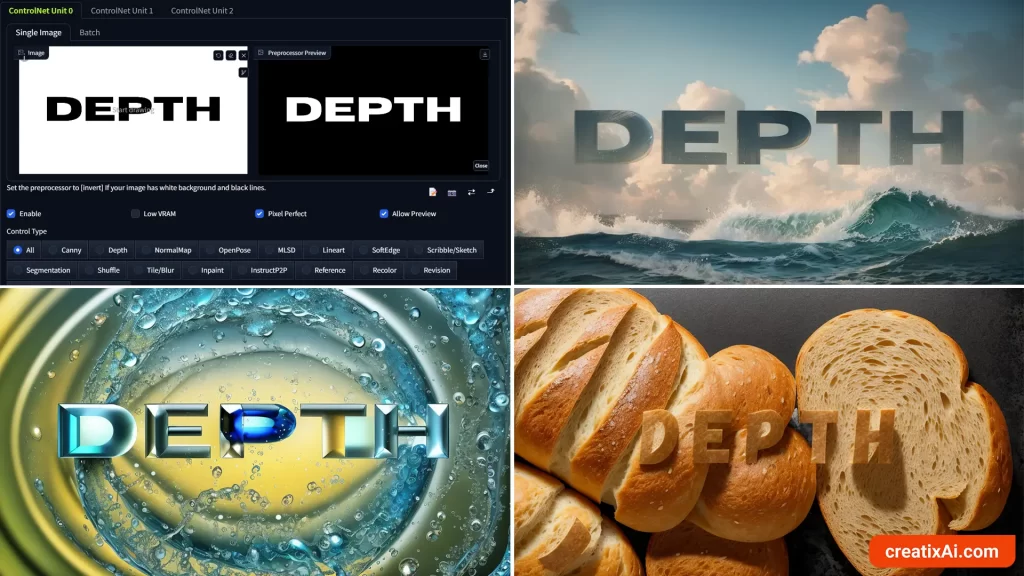
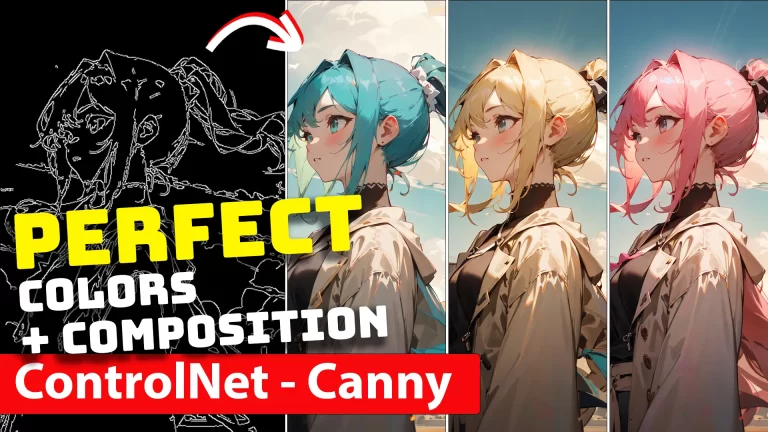
- In Txt2Img do the usual settings, write a prompt, and pick the size ratio of the text image you created.
- Drop in the text image inside ControlNet and select “All”
- In the pre-processor choose “Invert”
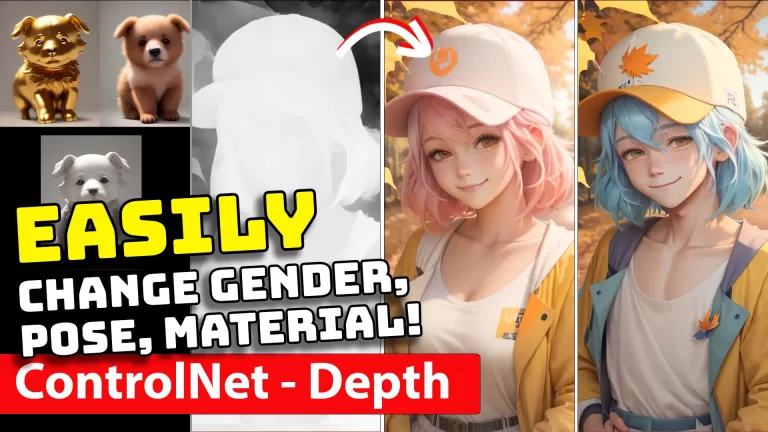
- In the model choose Depth.
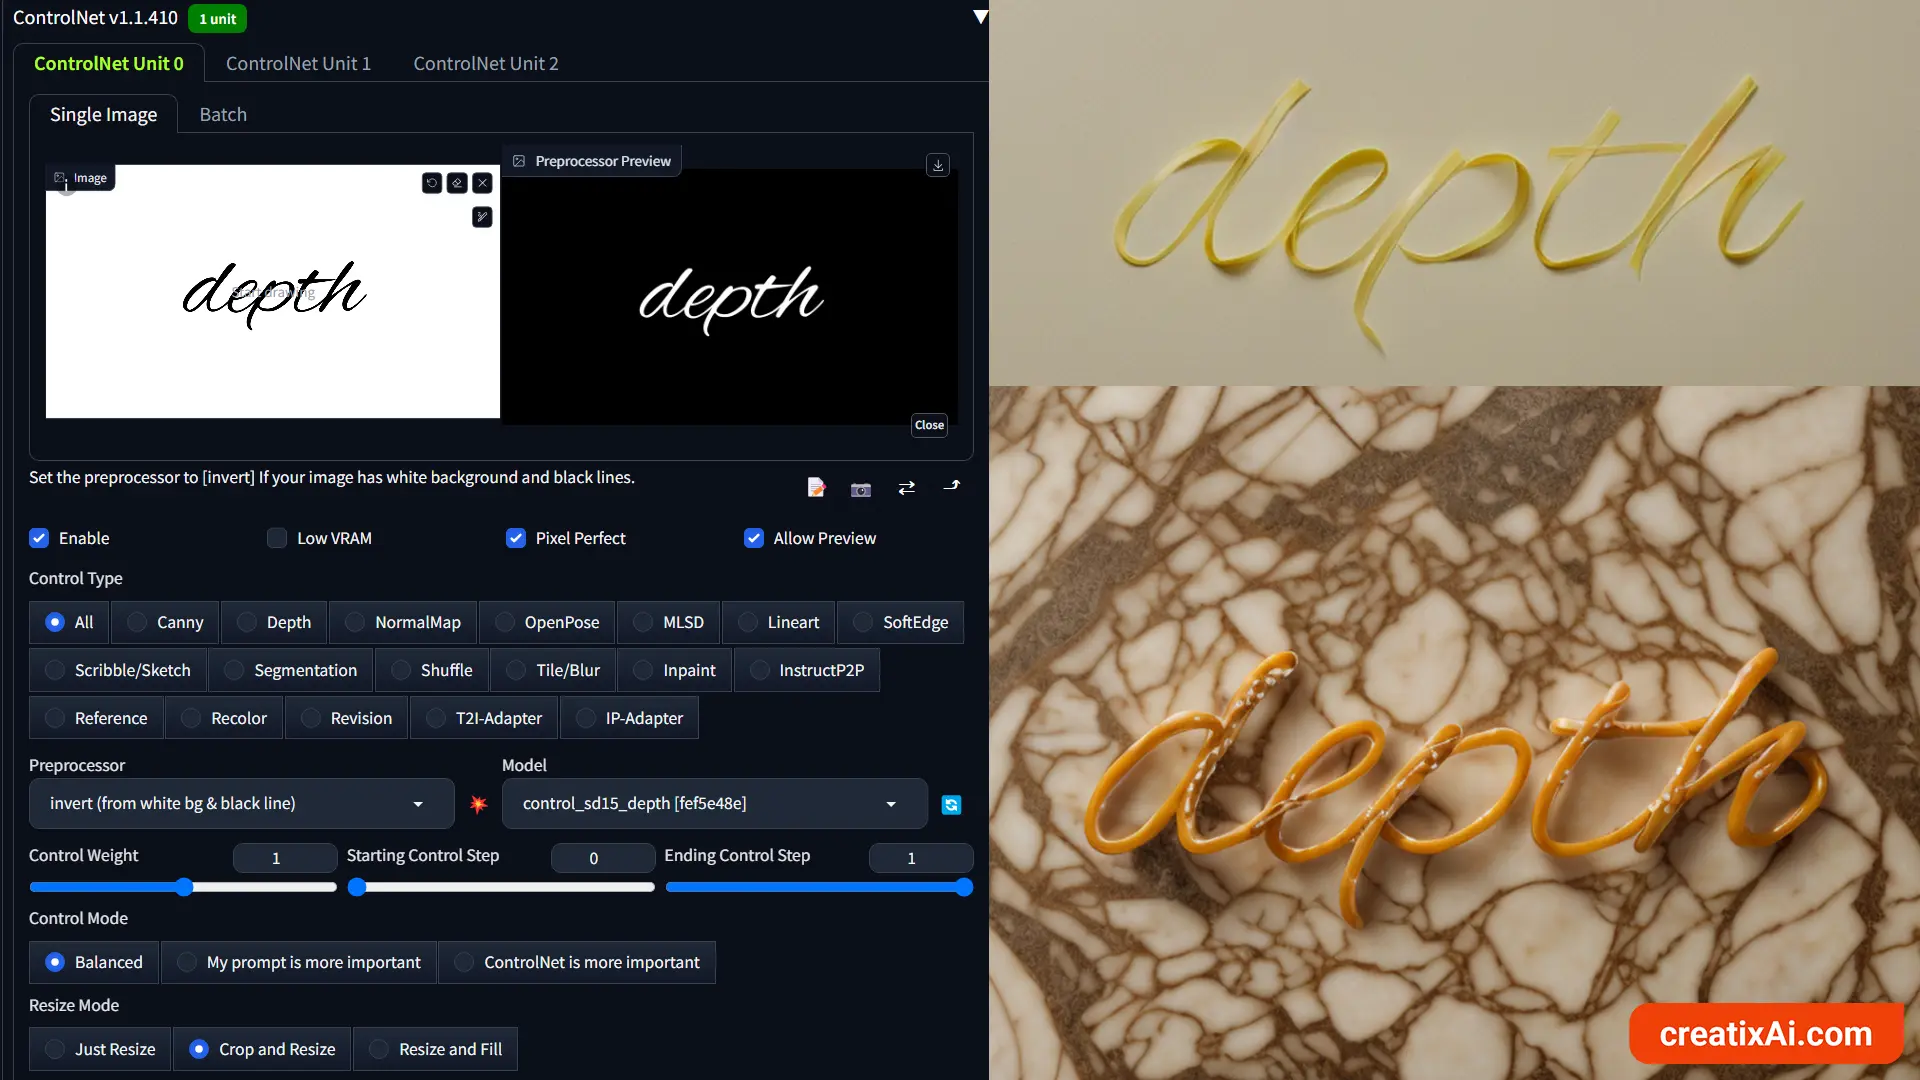
The first prompt is pasta noodles on a white table, and the second is a pretzel on a marble table.
You can see how Stable Diffusion transformed the text to fit your prompt while keeping the shape of the text image.
Also, note how the original font works well for this prompt, and if it was just regular text like you are reading from right now, the results wouldn’t work out as well.
Stable Diffusion doesn’t always transform the text to fit the prompt, sometimes it simply makes sure the text fits in with the overall image.
Here’s a list of fun prompts to try:
- Water
- Fire
- Pretzel
- Noddles
- Gum
- Bubbles
- Rocks
- Gold
- Wood
- Ice
- Neon
- Toothpaste
- Clouds
- Flowers
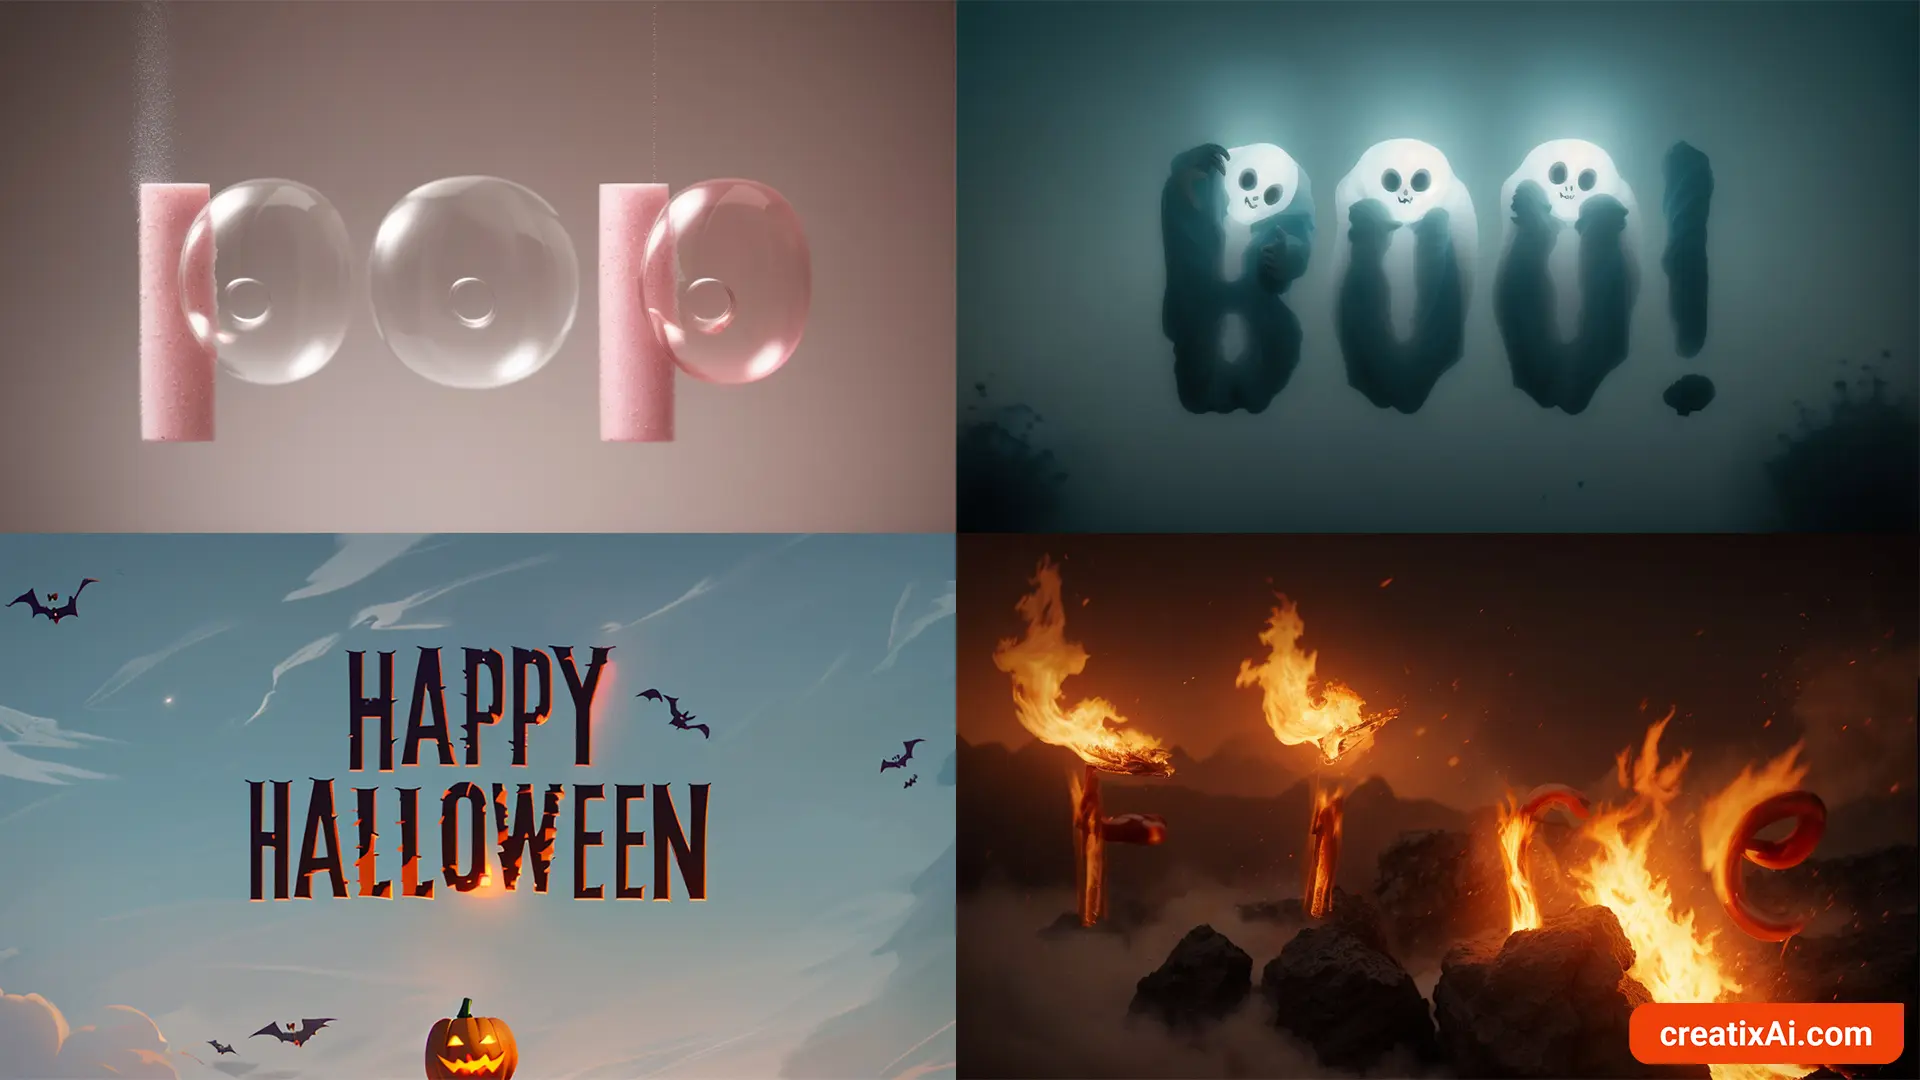
You could also always have specific prompts, like pumpkins and ghosts for Halloween-themed imagery, or hearts, flowers and cupids for Valentine’s Day, etc.
Using Multiple ControlNet
ControlNet is one of the most powerful tools in your arsenal as an AI artist. When it comes to text effects, you could also use multiple ControlNet options for various effects!
I won’t be going over each one in detail, as there’ll be a post written about this soon.
But let’s take a look at a few examples of what ControlNet with a second reference image can do.
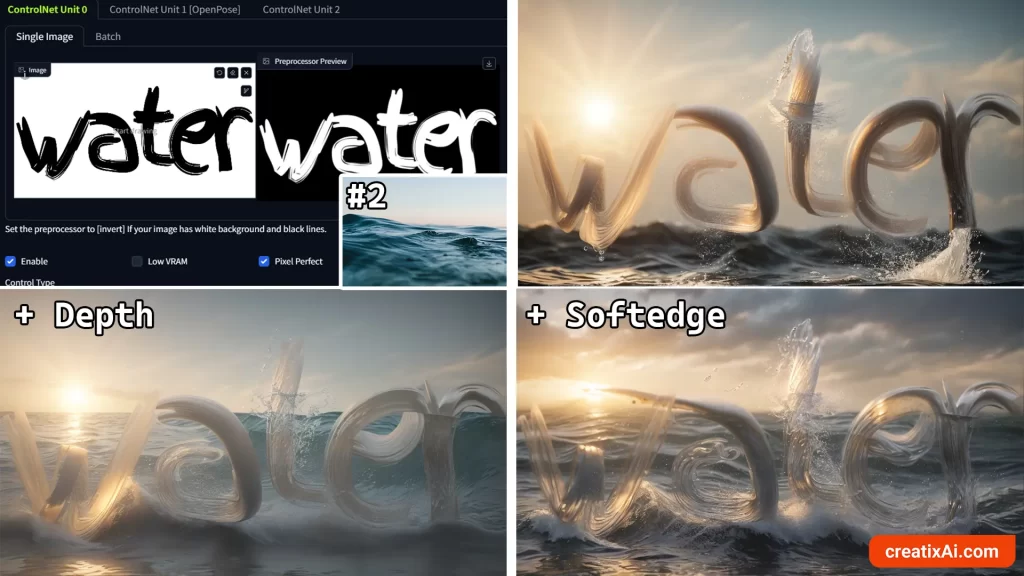
As you can see in the top left, I used the “Water” text image with the settings I told you about previously.
As for the second reference image, I picked a photo of water and used it with other different ControlNet Preprocessors with 0.5 weight.
The image on the top right is the result of only using the text image with the Depth Model.
By adding Depth with an ocean reference image we can see that the biggest difference is that of composition, but the image itself didn’t turn out as well as without the second ControlNet.
Although, using Softedge Controlnet resulted in a stunning ai-generation with a clear composition and lighting – I definitely like it better than the original, and you?
Makes me think that if I wanted a specific composition for my text effects, using Softedge is a great option.
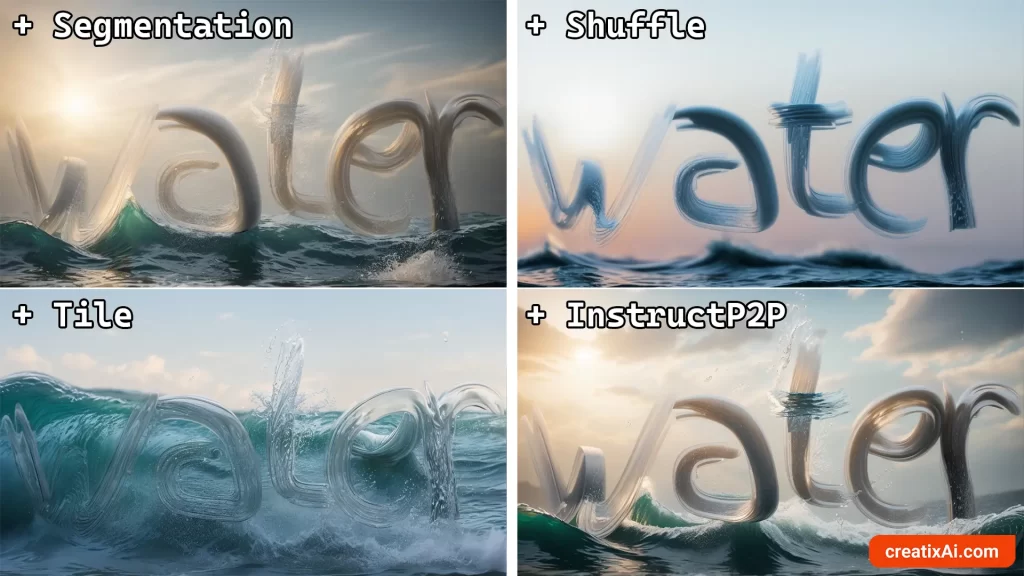
These next four examples are all completely unique in their composition and colors.
You could really use and experiment with all of the Controlnet preprocessors to get the most impressive results.
Adding more ControlNet Models
Follow the steps below if you don’t know how to add multiple ControlNet tabs:
- Go to the Settings tab.
- Find and click ControlNet on the left sidebar.
- Find the slider called Multi ControlNet: Max models amount (requires restart).
- Move the slider to 2 or 3.
- Scroll back up and click Apply Settings.
- Finally, click Reload UI.
Now, you should be able to see ControlNet Unit 0, ControlNet Unit 1, and maybe ControlNet Unit 2 in the ControlNet section.
Inpainting Text Effects
Another helpful use for this technique is to inpaint text into an already generated ai image.
For example, let’s say you generated an image of a store, but the sign is all messed up, and you want to call it a specific name.
I’m sure there are other ways of getting this done, but here’s my personal process:
- Open the image in an editing software, like Photoshop or Canva.
- Remove the messed up text by filling a shape with a similar color in Canva or by using “content-aware fill” in Photoshop.
- Write the text you want and position it on the sign.
- Duplicate the image and delete the background so you can only see the text.
- Download both images.
You should now have the original ai-image with the messed-up text removed and another image with just the text you want.
You can try it without removing the text, but if it doesn’t work then this is a useful step to add.
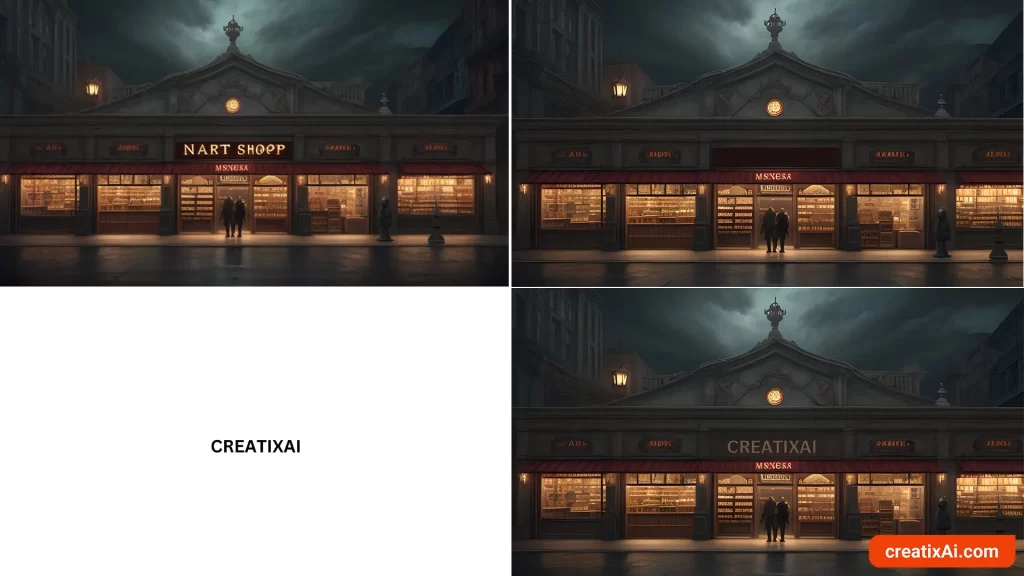
Now, transfer all of the original settings into Inpaint tab, and change the original ai-image to the one you fixed.
Then, inside ControlNet, drop just the text image and select Invert and Depth.
Now, try it with Inpaint Area – Whole Picture and Only Masked. One of them will surely work!
- Tip: if you want the text to blend with the background more effectively inside Inpaint or Txt2Img, then lower that Control Weight!
Hope you enjoyed this Stable Diffusion Text Effects tutorial.
Let me know in the comments what else you would like to learn.
Cheers!


One Response
Thank you for this I’ve been trying to get texts to work for a while now and they always came out blurry I appreciate it and I hope that you have a wonderful day 😀