Learn how to train LORA for Stable Diffusion XL (SDXL) locally with your own images using Kohya’s GUI. Follow this step-by-step tutorial for an easy LORA training setup.
Prefer watching? Check out my YouTube video on training LORA locally step-by-step:
Using Kohya_ss To Train LORA
Kohya is an open-source project that focuses on stable diffusion-based models for image generation and manipulation.
You can learn more about Kohya_ss on the project’s Github page.
- I’ve already written an article with step-by-step instructions for installing Kohya_ss locally in under 5 minutes.
- Check it out before proceeding with this article on training LORAs with Kohya.
Preparing Images for LORA Training
You have to prepare images for training before you start training your own LORA model.
Collect all the images you want to train a LORA on in one folder. You can use images of yourself, other characters, objects or styles.
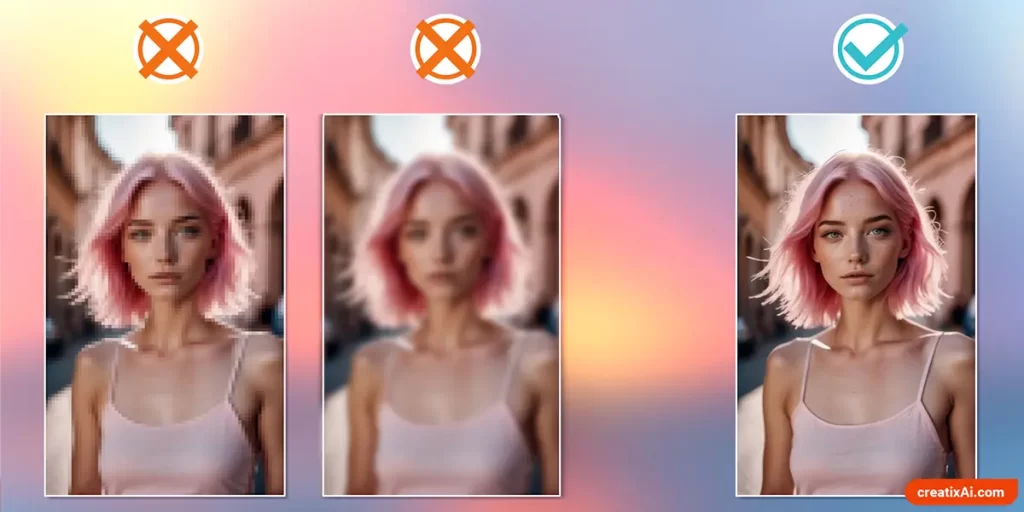
The better the image quality – the better your LORA and your final ai-generated images will be.
Here are some ideas for finding high-quality images:
- Look on Google Images with advanced search turned on for “Large”.
- Or use Advanced Google Image Search with image size “Larger than 4-6 MP” images.
- Check out stock image sites.
- Look for websites with high-res movie screencaps.
- Wikimedia has a lot of good stuff as well.
Try to find images with different angles, emotions, lighting, distance from camera, clothing, hairstyles, etc. Variance is good as it will allow you to generate more varied images afterward.
- Tip: Select all images and press F2 on your keyboard to rename all of them at once if you want.
How many images to train Lora?
For characters, you can use as few as 10 high-quality images to train an effective LORA. However, more images might produce more believable and/or detailed LORA for better ai-generated images.
To replicate a specific style, you will probably need 20+ images.
In my experience, the number also heavily depends on the quality and uniqueness of the images you use for training.
To be safe, I’d suggest starting with 10-20 images and adding more photos if the results don’t meet your expectations.
Cropping Images
In the past, it was common practice to crop the images you prepared to 512×512 using websites like Birme. However, it’s no longer necessary, and you will get a higher-quality LORA without cropping the images.
Now, Kohya has an option that allows it to group your images by certain ratios for training, keeping your original images with more details and information intact. I suggest using this option.
Although, if your computer can’t handle large files, you can crop the images or compress them.
Captioning Images
Captioning images is an easy task that can be done using Kohya Utilities > Captioning.
Most often I use BLIP and WD14 captioning. They are different in structure, so choose the one you are more likely to use with this model (although I mix and match sometimes).
- BLIP: a woman with pink hair and blue eyes
- WD14: 1girl, solo, pink hair, blue eyes
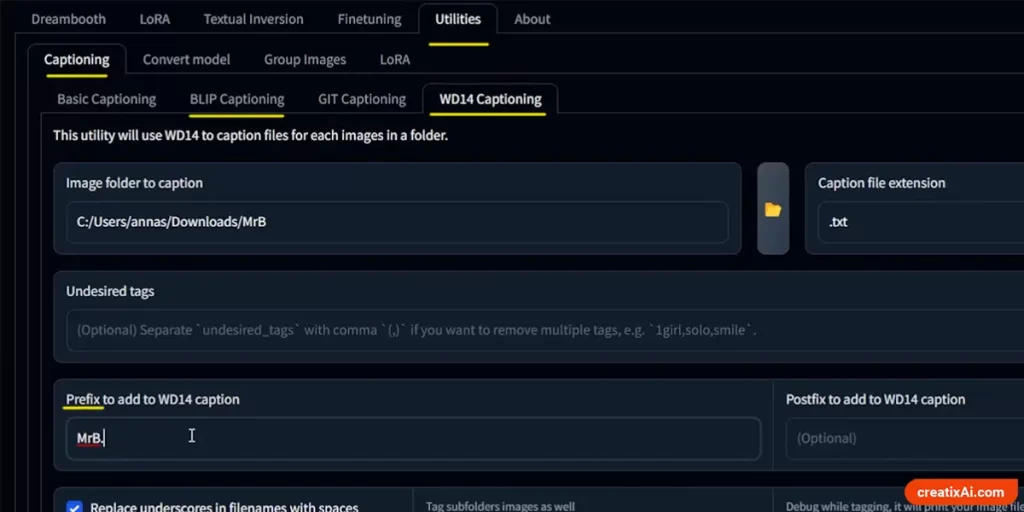
You can also add a prefix or postfix. For example, if training Nezuko from Demon Slayer, you can add “Nezuko” in the prefix.
Stable Diffusion might be familiar with the character or celebrity you are trying to train, so it might only help with your LORA. This also applies to the “instance prompt” below.
After you run the process with Kohya, you will have a .txt file with the same name near each image.
You can then open each file separately to ensure it’s appropriate, and make some changes.
Preparing Folders for Training
You need a few folders in order to create your own LORAs that you can prepare yourself or use Kohya to do it.
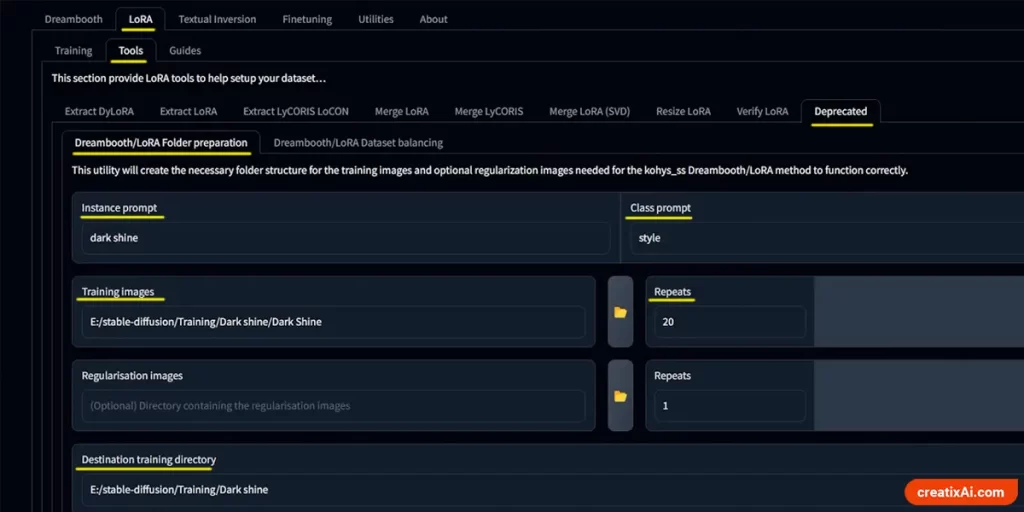
- Go to Lora > Tools > Deprecated
- Instance prompt: type in who you are training. Ex: Nezuko
- Class prompt: type in a classifier like woman, man, object, person, style, dog, etc.
- Training Images: Open the folder with your prepared images.
- Repeats: how many times they will be trained. 20 is a safe bet.
- Regularisation images: if you have a folder with many high-res images of your classifier, you can use it. I never do, and the results are still great! Plus, it takes less time to train without them.
- Destination training directory: where you want to generate the folders for training.
After clicking “Prepare Training Data” all the folders you need should be generated in the selected destination folder.
You will notice that your image folder will be named something like “20_Nezuko”. This number is added from the repeats you chose to give Kohya training directions. Don’t rename it.
How to Train Lora – Kohya Settings
Now that your images and folders are prepared, you are ready to train your own custom SDXL LORA model with Kohya.
LORA Source Model
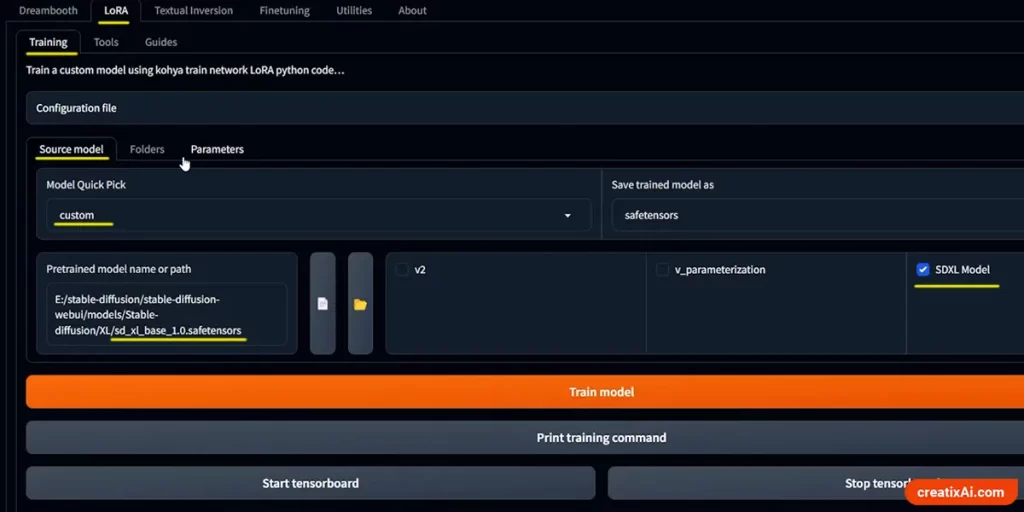
In “Pretrained model name or path” pick the location of the model you want to use for the base, for example Stable Diffusion XL 1.0.
And make sure to checkmark “SDXL Model” if you are training the SDXL model.
The settings below are specifically for the SDXL model, although Stable Diffusion 1.5 has mostly similar training settings.
LORA Folders
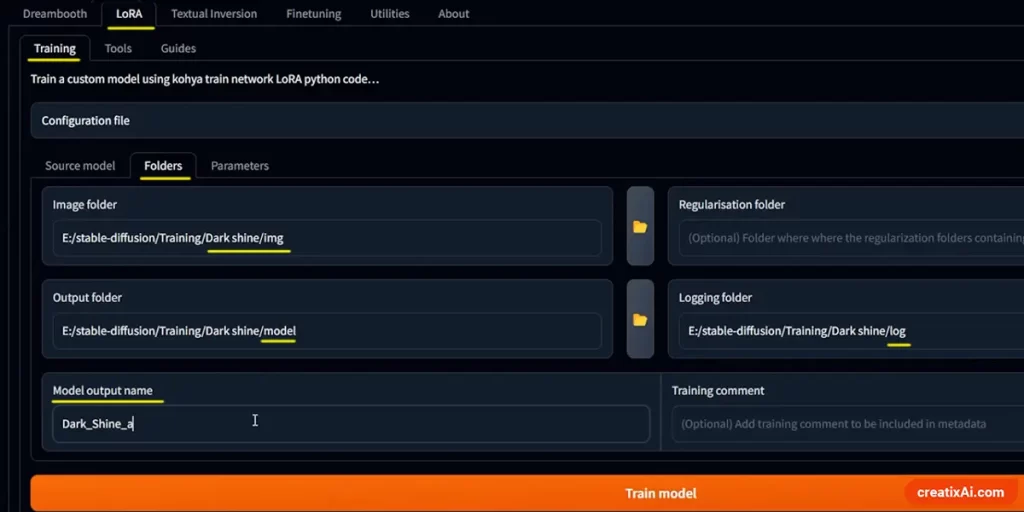
Select the corresponding folders that we generated above in the “Preparing Folders for Training” section.
And make sure to name your model in the “Model Output Name”
LORA Parameters
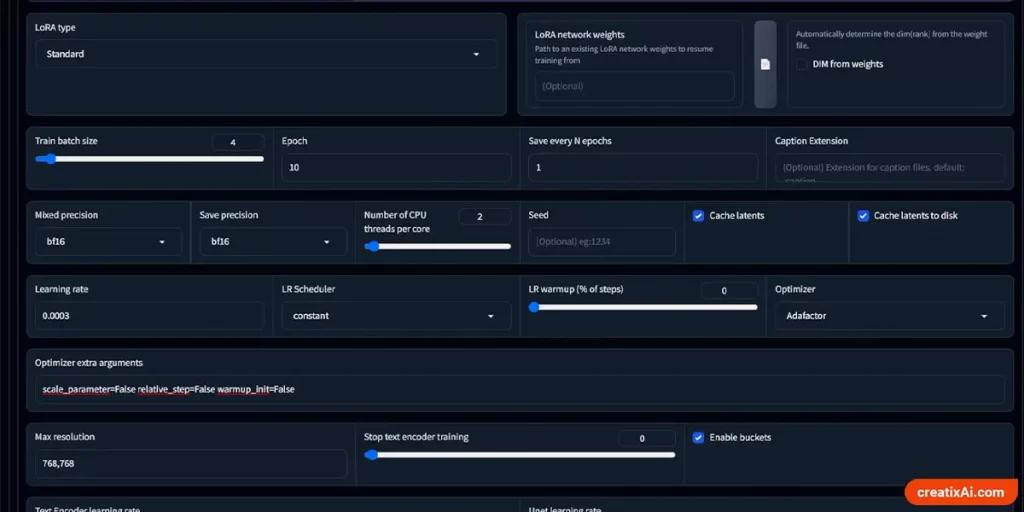
There are many options in this section, and many variations of the settings below will work just as well.
I will show you my settings and try to explain what most of them mean so you can make adjustments that will fit your LORA best.
If I don’t mention a setting – that’s because it’s either left empty or not selected.
- LORA type – Standard.
- Train batch size – for a person 1 is probably best, but for a style, you can go higher, to like 5, if your computer can handle it.
- Epoch – how many times you want to repeat the training on top of the original. I always go with 10, so I can then test all the LORAs and find the perfect one.
- Save every N epochs: if you leave it at 1, each epoch will create a separate LORA file. If 2, then only epoch 2-4-6-8-10 will be saved, and so on. To save space, you can do 2, but if you can, I suggest saving every epoch and then deleting the ones that didn’t work out.
- Mixed Precision/ Save Precision: I go with BF16, but if you don’t have a 30XX series graphics card or newer, you need to use FP16 instead.
- Number of CPU threads per core: 2
- Cache latents and cache latents to disk – checkmark both.
- Learning rate: Input a value between 0.001-0.004
- LR scheduler – Constant with a warmup of 0%
- Optimizer – Adafactor
- Optimizer extra arguments – scale_parameter=False relative_step=False warmup_init=False
- Max resolution – 1024,1024 (or use 768,768 to save on Vram, but it will produce lower-quality images).
- Enable buckets – checkmark it and you won’t need to crop training images. Can change the max bucket resolution to 1024 – 2048 if you have some very large images.
- Text and Unet learning rate – input the same number as in the learning rate.
- No half VAE – checkmark.
- Network rank – a larger number will make the model retain more detail but will produce a larger LORA file size. I use 256 Network Rank and 1 Network Alpha. You can also go got 32 and 16 for a smaller file size, and it will look very good as well.
- In the Advanced settings:
- Checkmark “Gradient checkpointing” and “Don’t upscale bucket resolution”.
This configuration will use about 20GB GPU memory. I have a 3090 and it works well.
Testing LORAs
If you followed this tutorial and trained 10 epochs saving at 1 N epochs, you should now have 10 different LORA files.
You can find them in the “Model” folder you selected for this training.
Now copy them, and paste them to Stable Diffusion > Models > Lora.
If, for some reason, you don’t have it installed yet, follow my Automatic1111 Stable diffusion installation tutorial.
You can see them in your Automatic1111 LORA tab after a refresh.
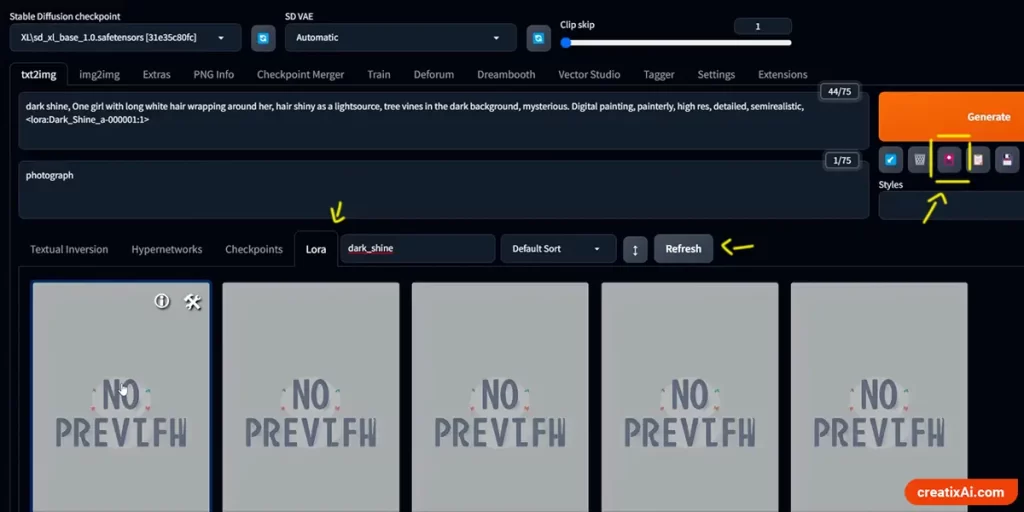
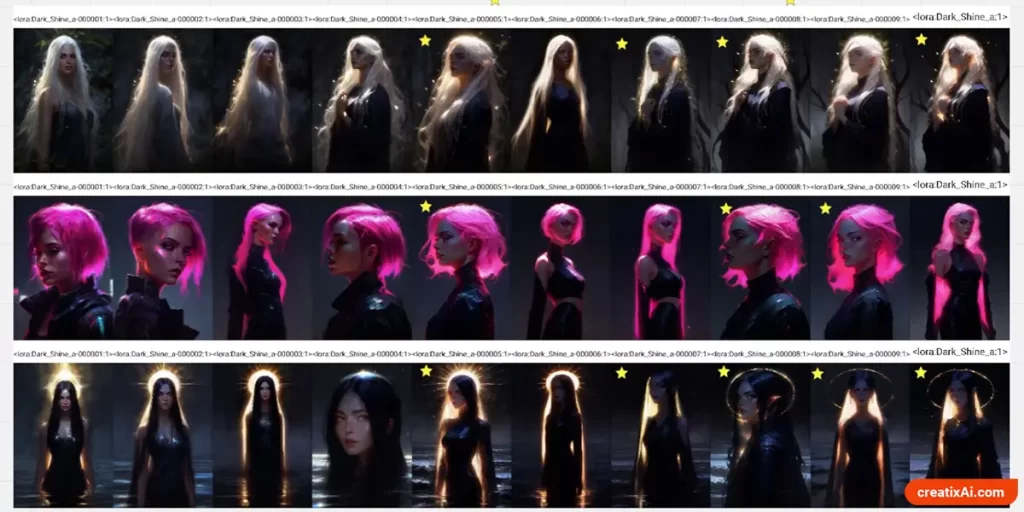
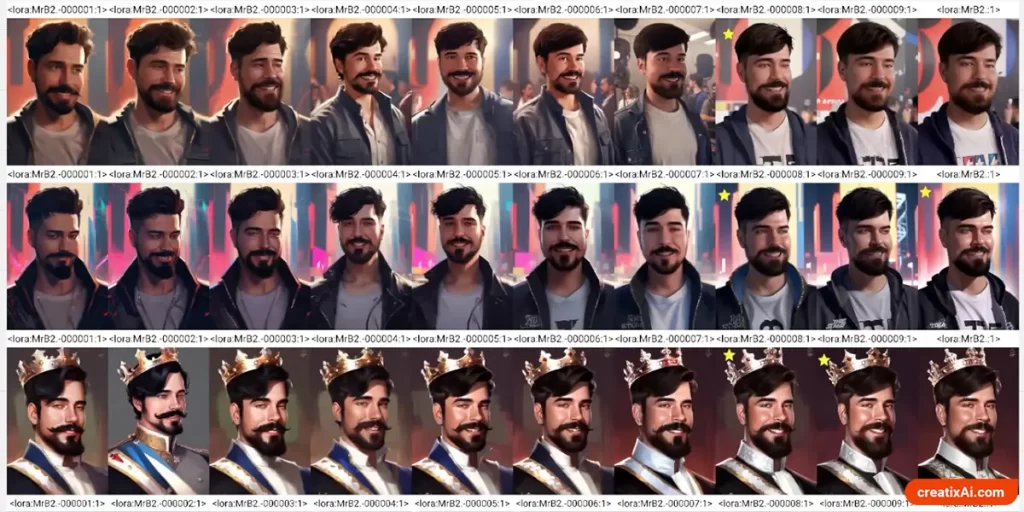
To test which LORA epoch works best, write a prompt and use the XYZ>Prompt S/R option.
Paste in the names of each of your LORAs and separate them with commas. You will be able to see the difference between each epoch in a gridded image.
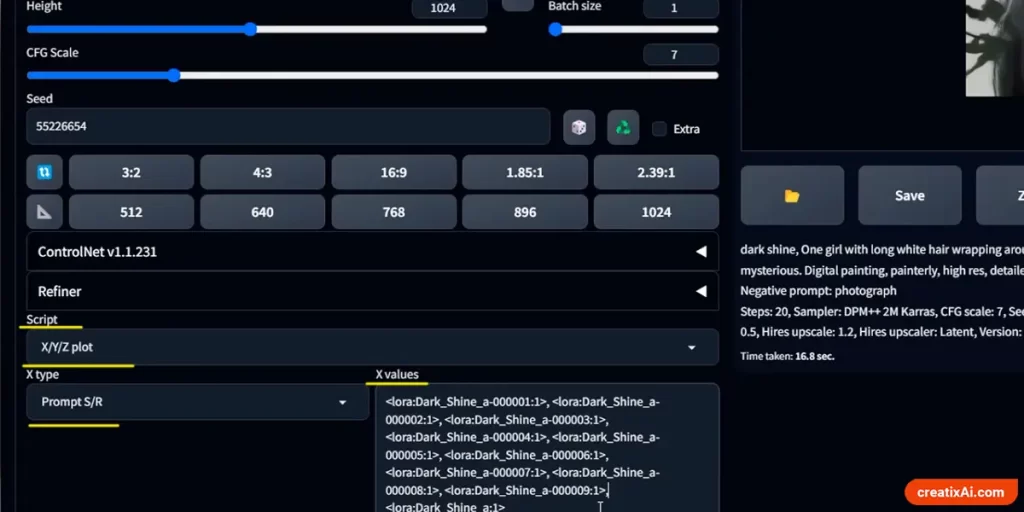
Do it a couple of times to know for sure which LORA version is the best.
Hope this tutorial on how to train LORA locally with Kohya GUI was easy to follow and helpful. Have fun training your own LORAs!